Admin Help
Preface: On every page of the site, there will be an admin action menu in the bottom right corner of your screen.

This gives you the ability to perform actions that a normal client can't do.
This will be your starting point for most of the solutions provided here.
How do I add a sign for a client without purchasing a new sign or rider?
- Click on the "Admin" button in the bottom right corner of your screen.
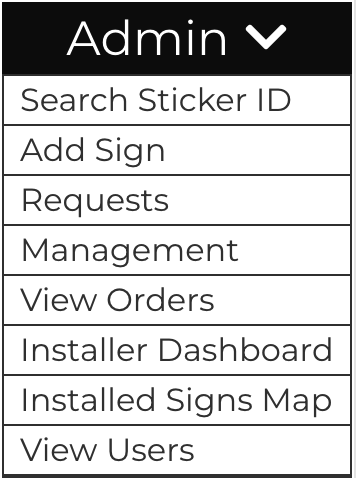
- After clicking on "Admin", the admin menu will slide up giving you a list of pages to view.
- Click "Add Sign".
- The page you are now viewing gives you the ability to add a sign or rider for a user without purchasing a new one.
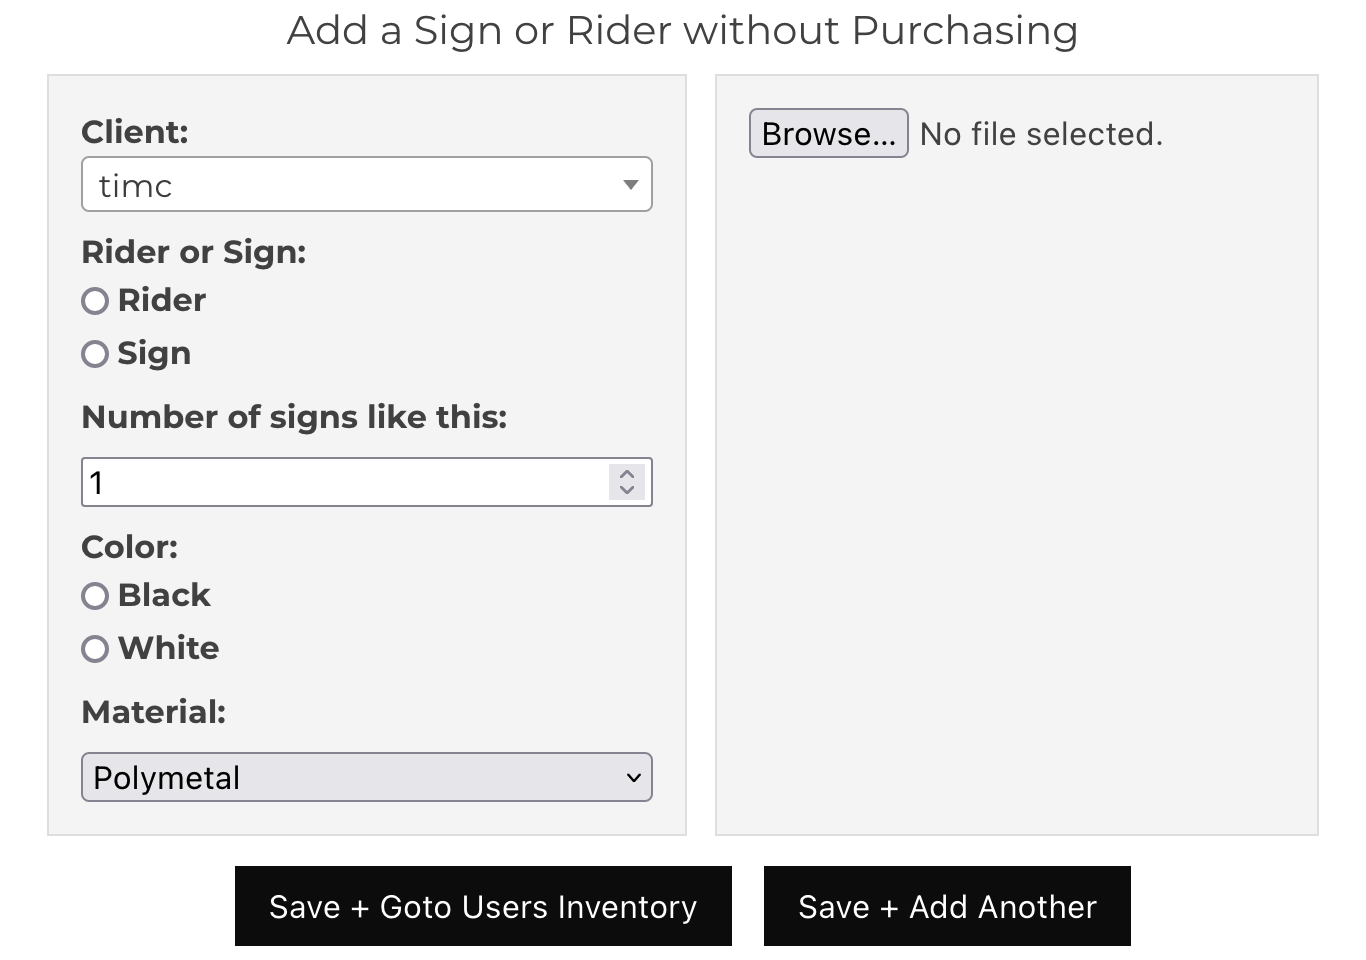
- Fill out who the sign is for (Client). This displays a dropdown of all clients and gives you the ability to search for one.

- From there, select whether you are adding a rider or a sign.

- Once the rider or sign has been selected, you will see additional fields added.
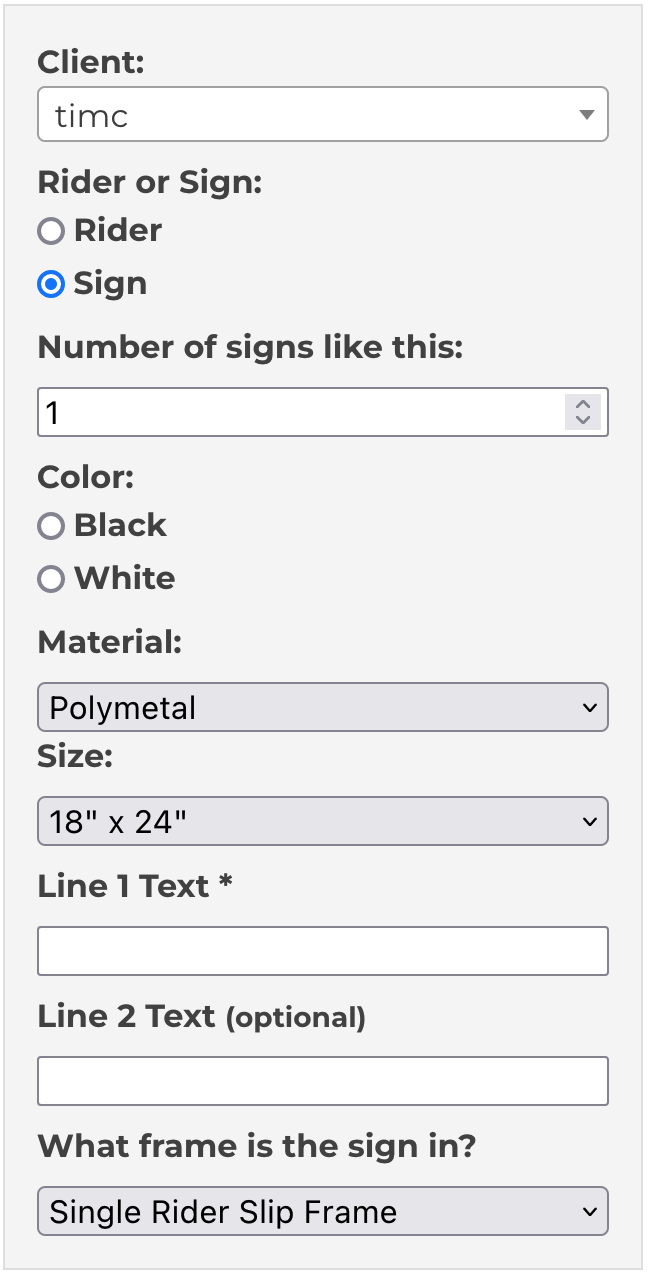
- Continue filling out the rest of the required fields.
- After all the required information has been filled out, click on either "Save + Goto User's Inventory" or "Save + Add Another".

- You have successfully added a sign/rider for a client!
How do I duplicate an existing sign for a client?
- Open up the admin action menu in the bottom right corner of your screen.

- Click on "View Users".
- Find the user you'd like to make a duplicate sign for.
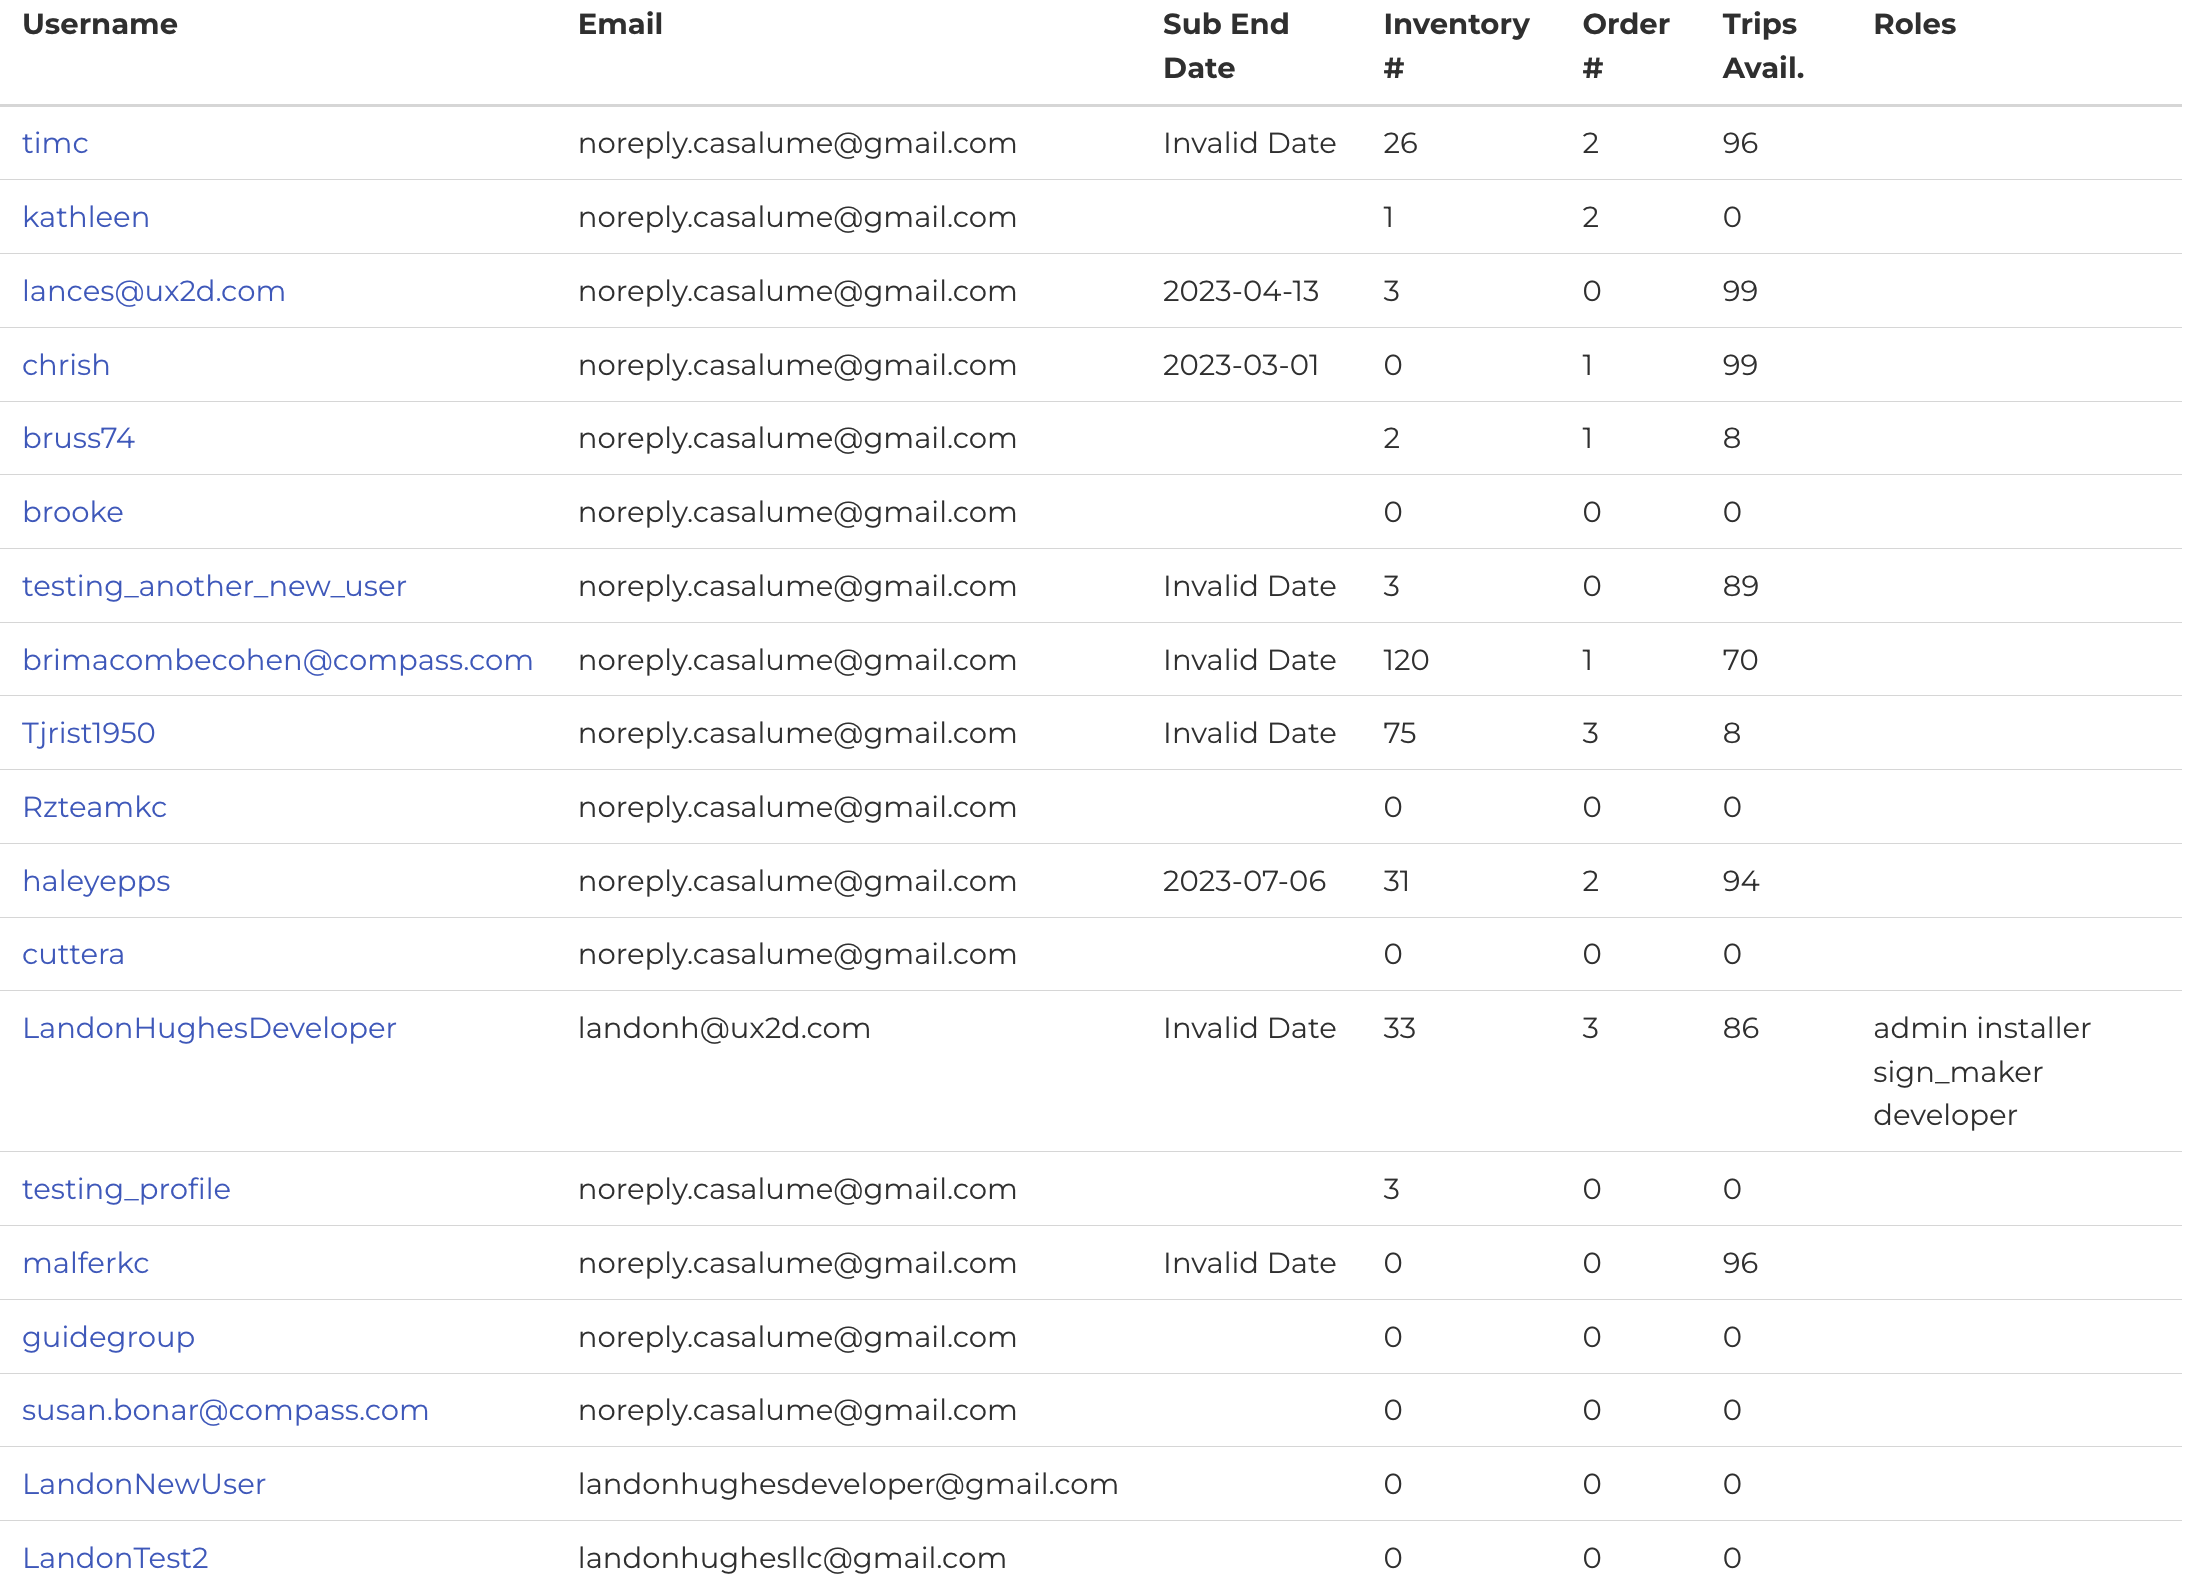
- Once you have found a user, click on the user's username. You will be taken to a view of their dashboard.

- If "Toggle Packing" is off, click on it once to ungroup like signs.
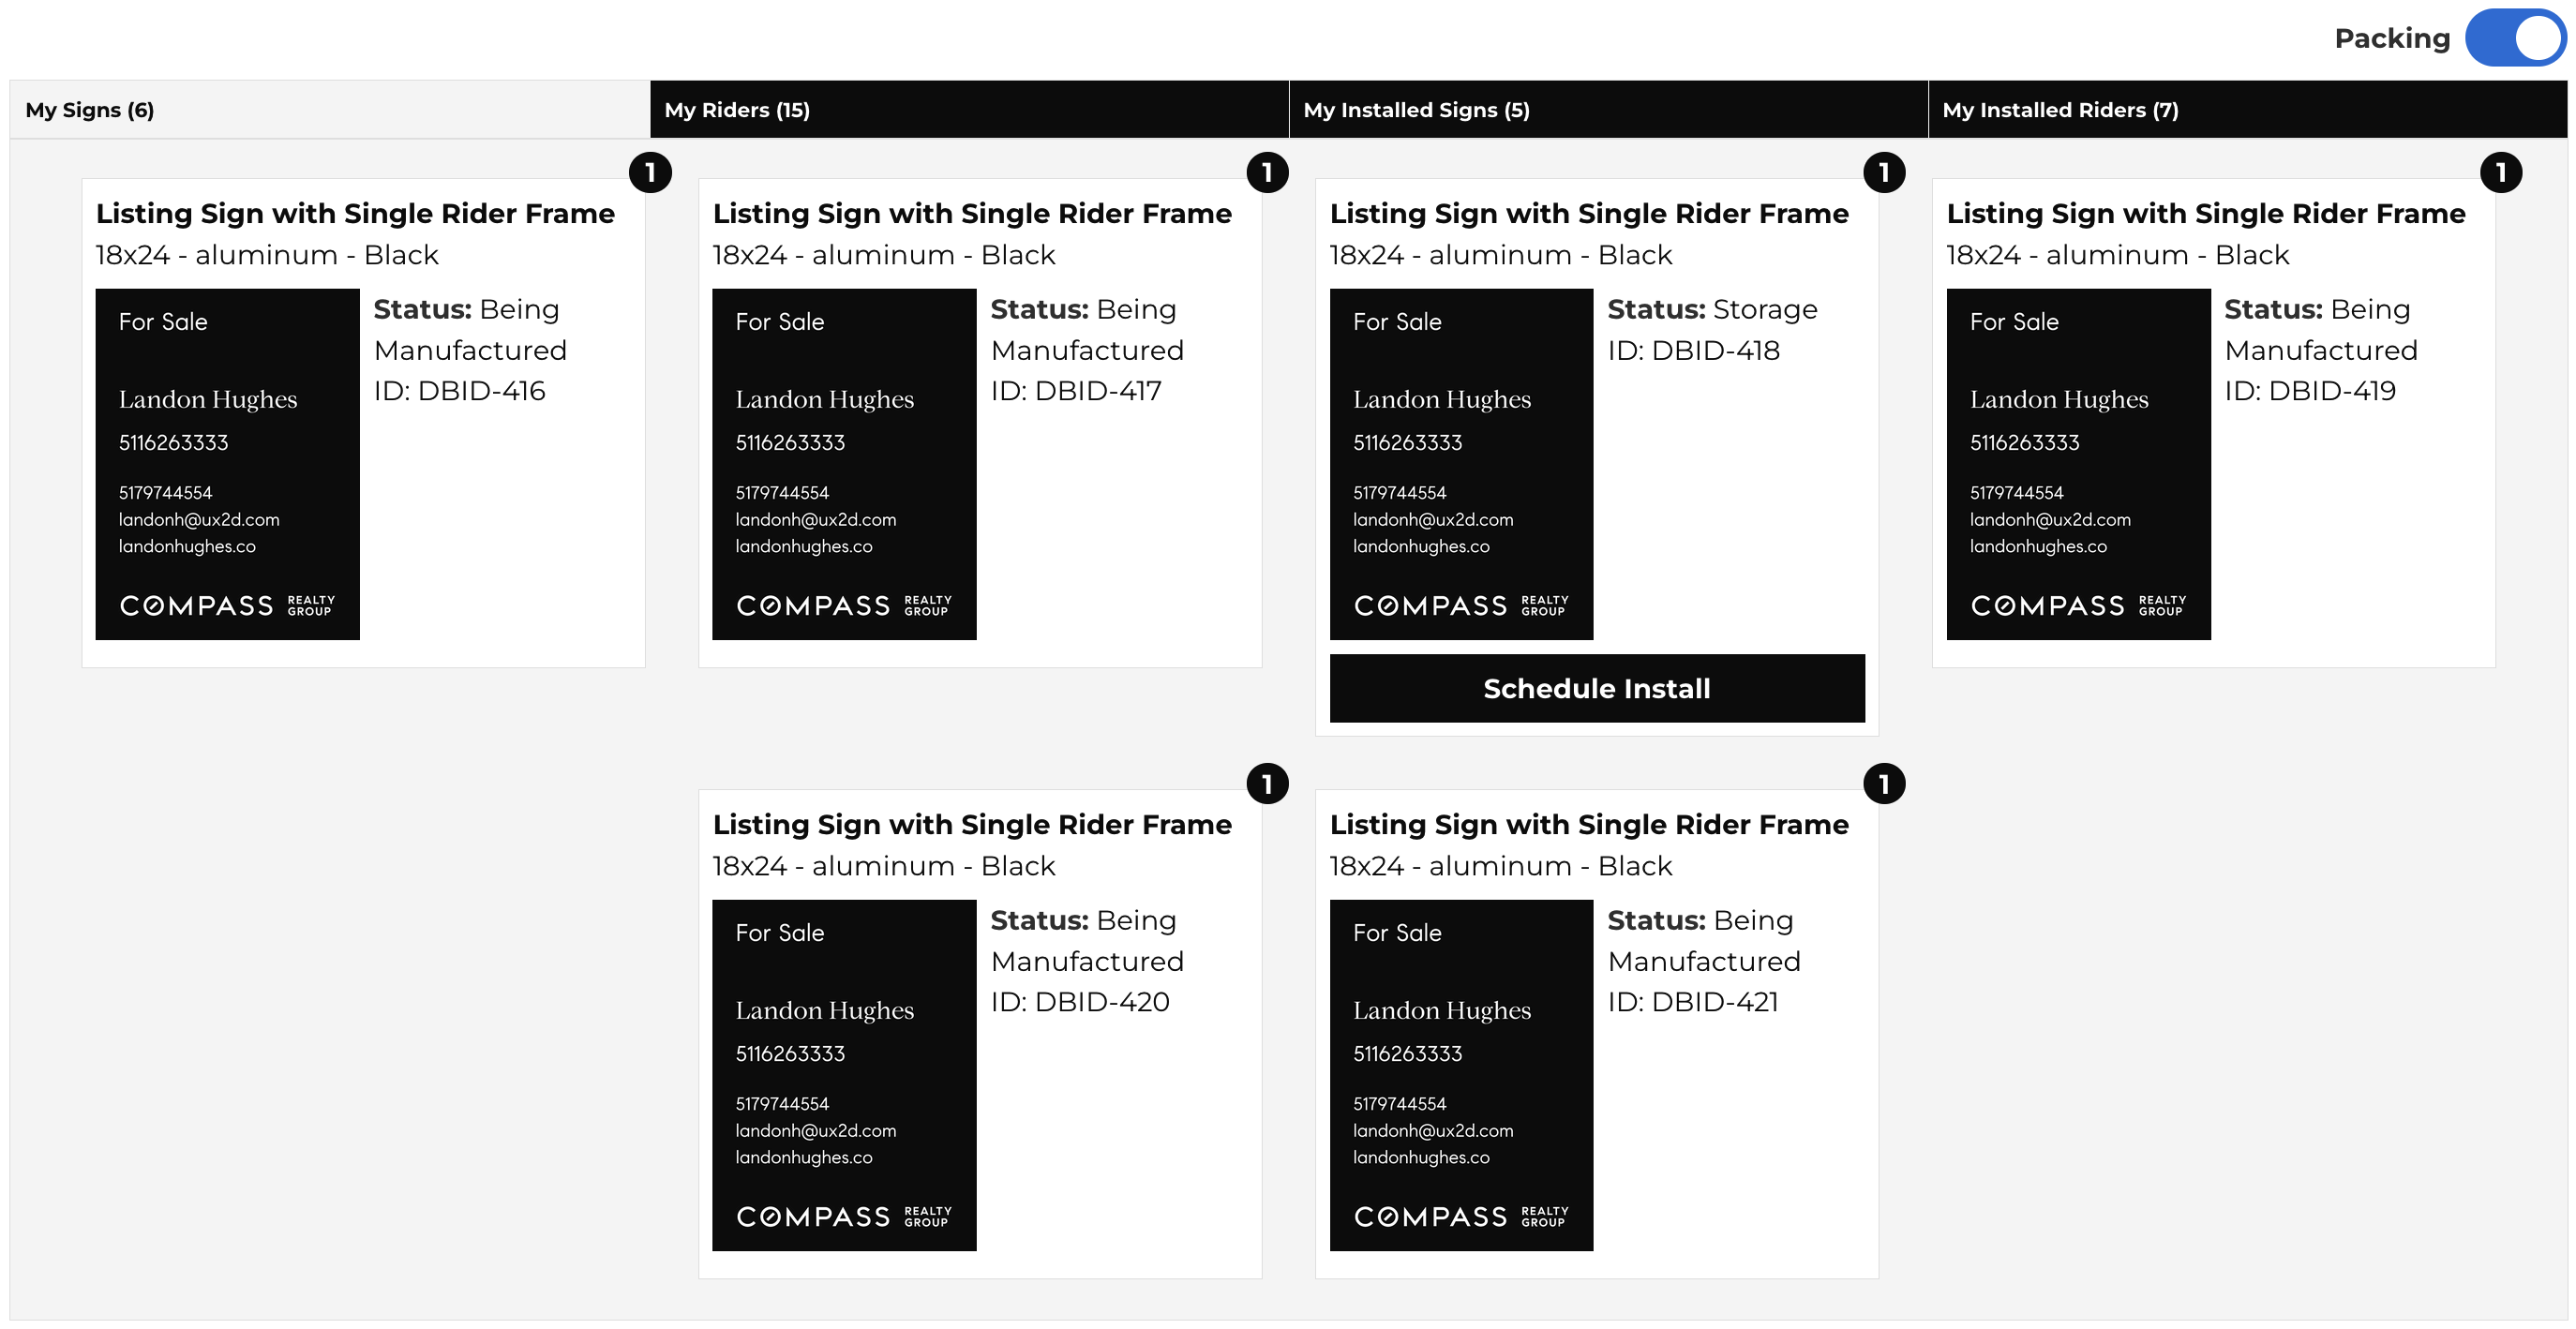
- Click on either the "My Signs" or "My Riders" tab, then find the sign you'd like to duplicate.
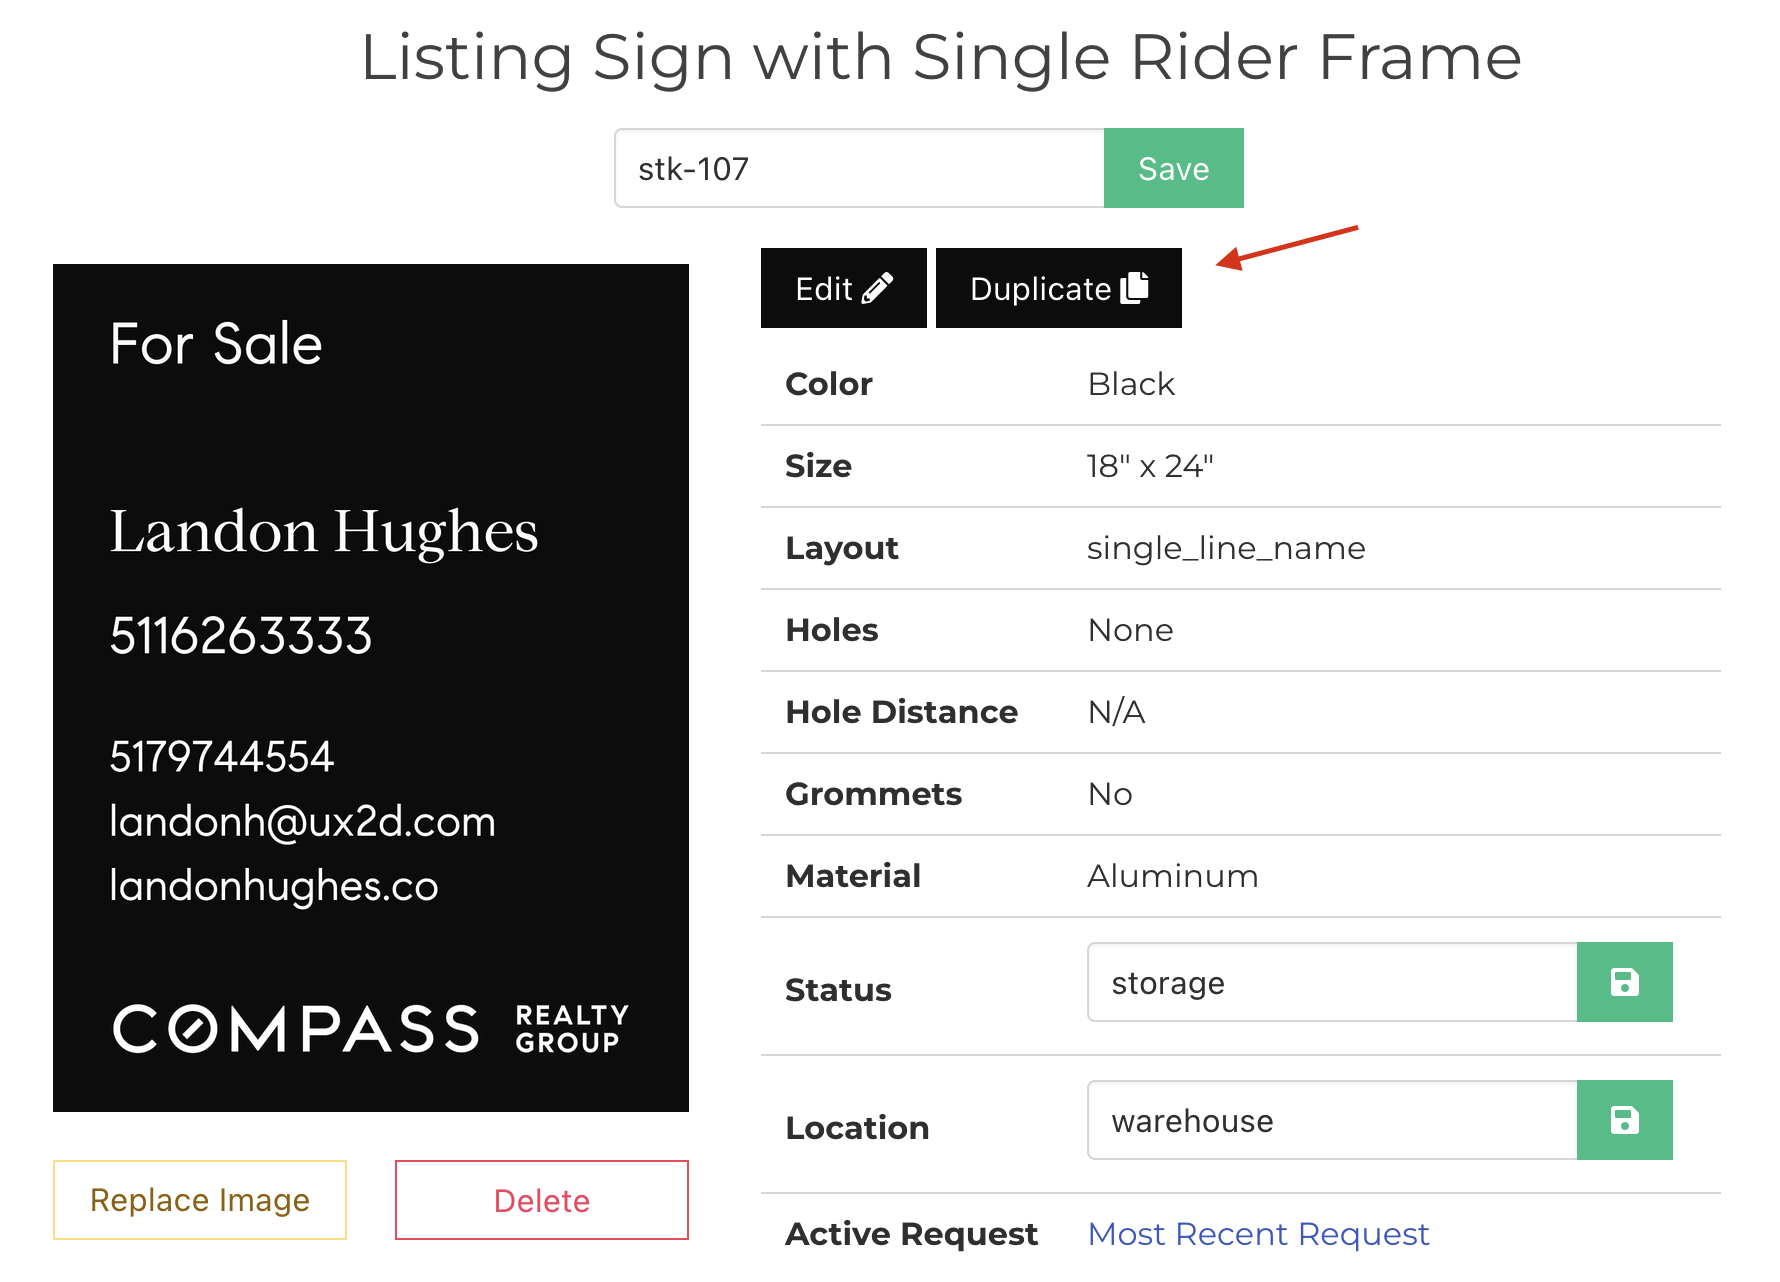
- Once you have a sign you'd like to duplicate, tap on the sign or rider image. You will be taken to the sign detail or rider detail page, respectively.
- From the sign detail or rider detail page, you will see a green "Duplicate" button beneath the sign/rider. Click it.
- From here, you will see a page pre-populated with all the sign or rider specifics.
- The only thing you will need to add is how many signs you'd like to add under "Number of signs like this".
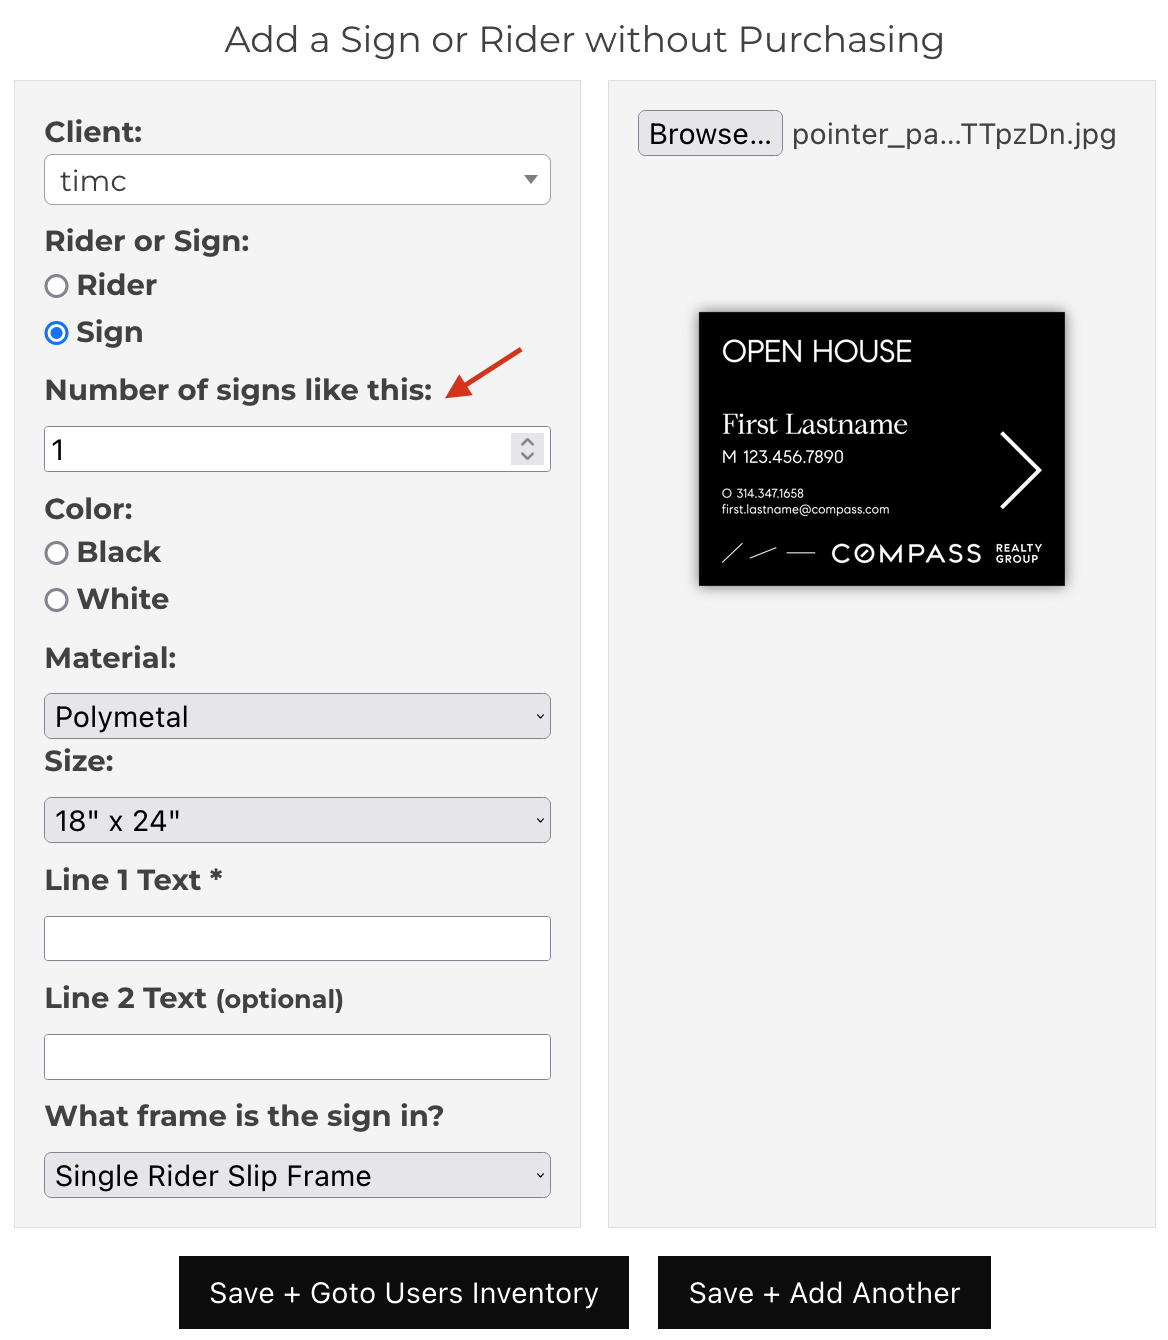
- If everything looks correct, click on either "Save + Goto User's Inventory" or "Save + Add Another".

- You have successfully duplicated a sign for a client!
A sign or rider is no longer in "Manufacturing". How do I check it in?
- From the admin action menu, click on "Management".
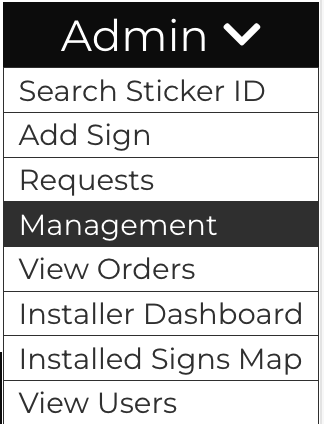
- On this page, you will see tabs named "Signs in Manufacturing" and "Riders in Manufacturing".
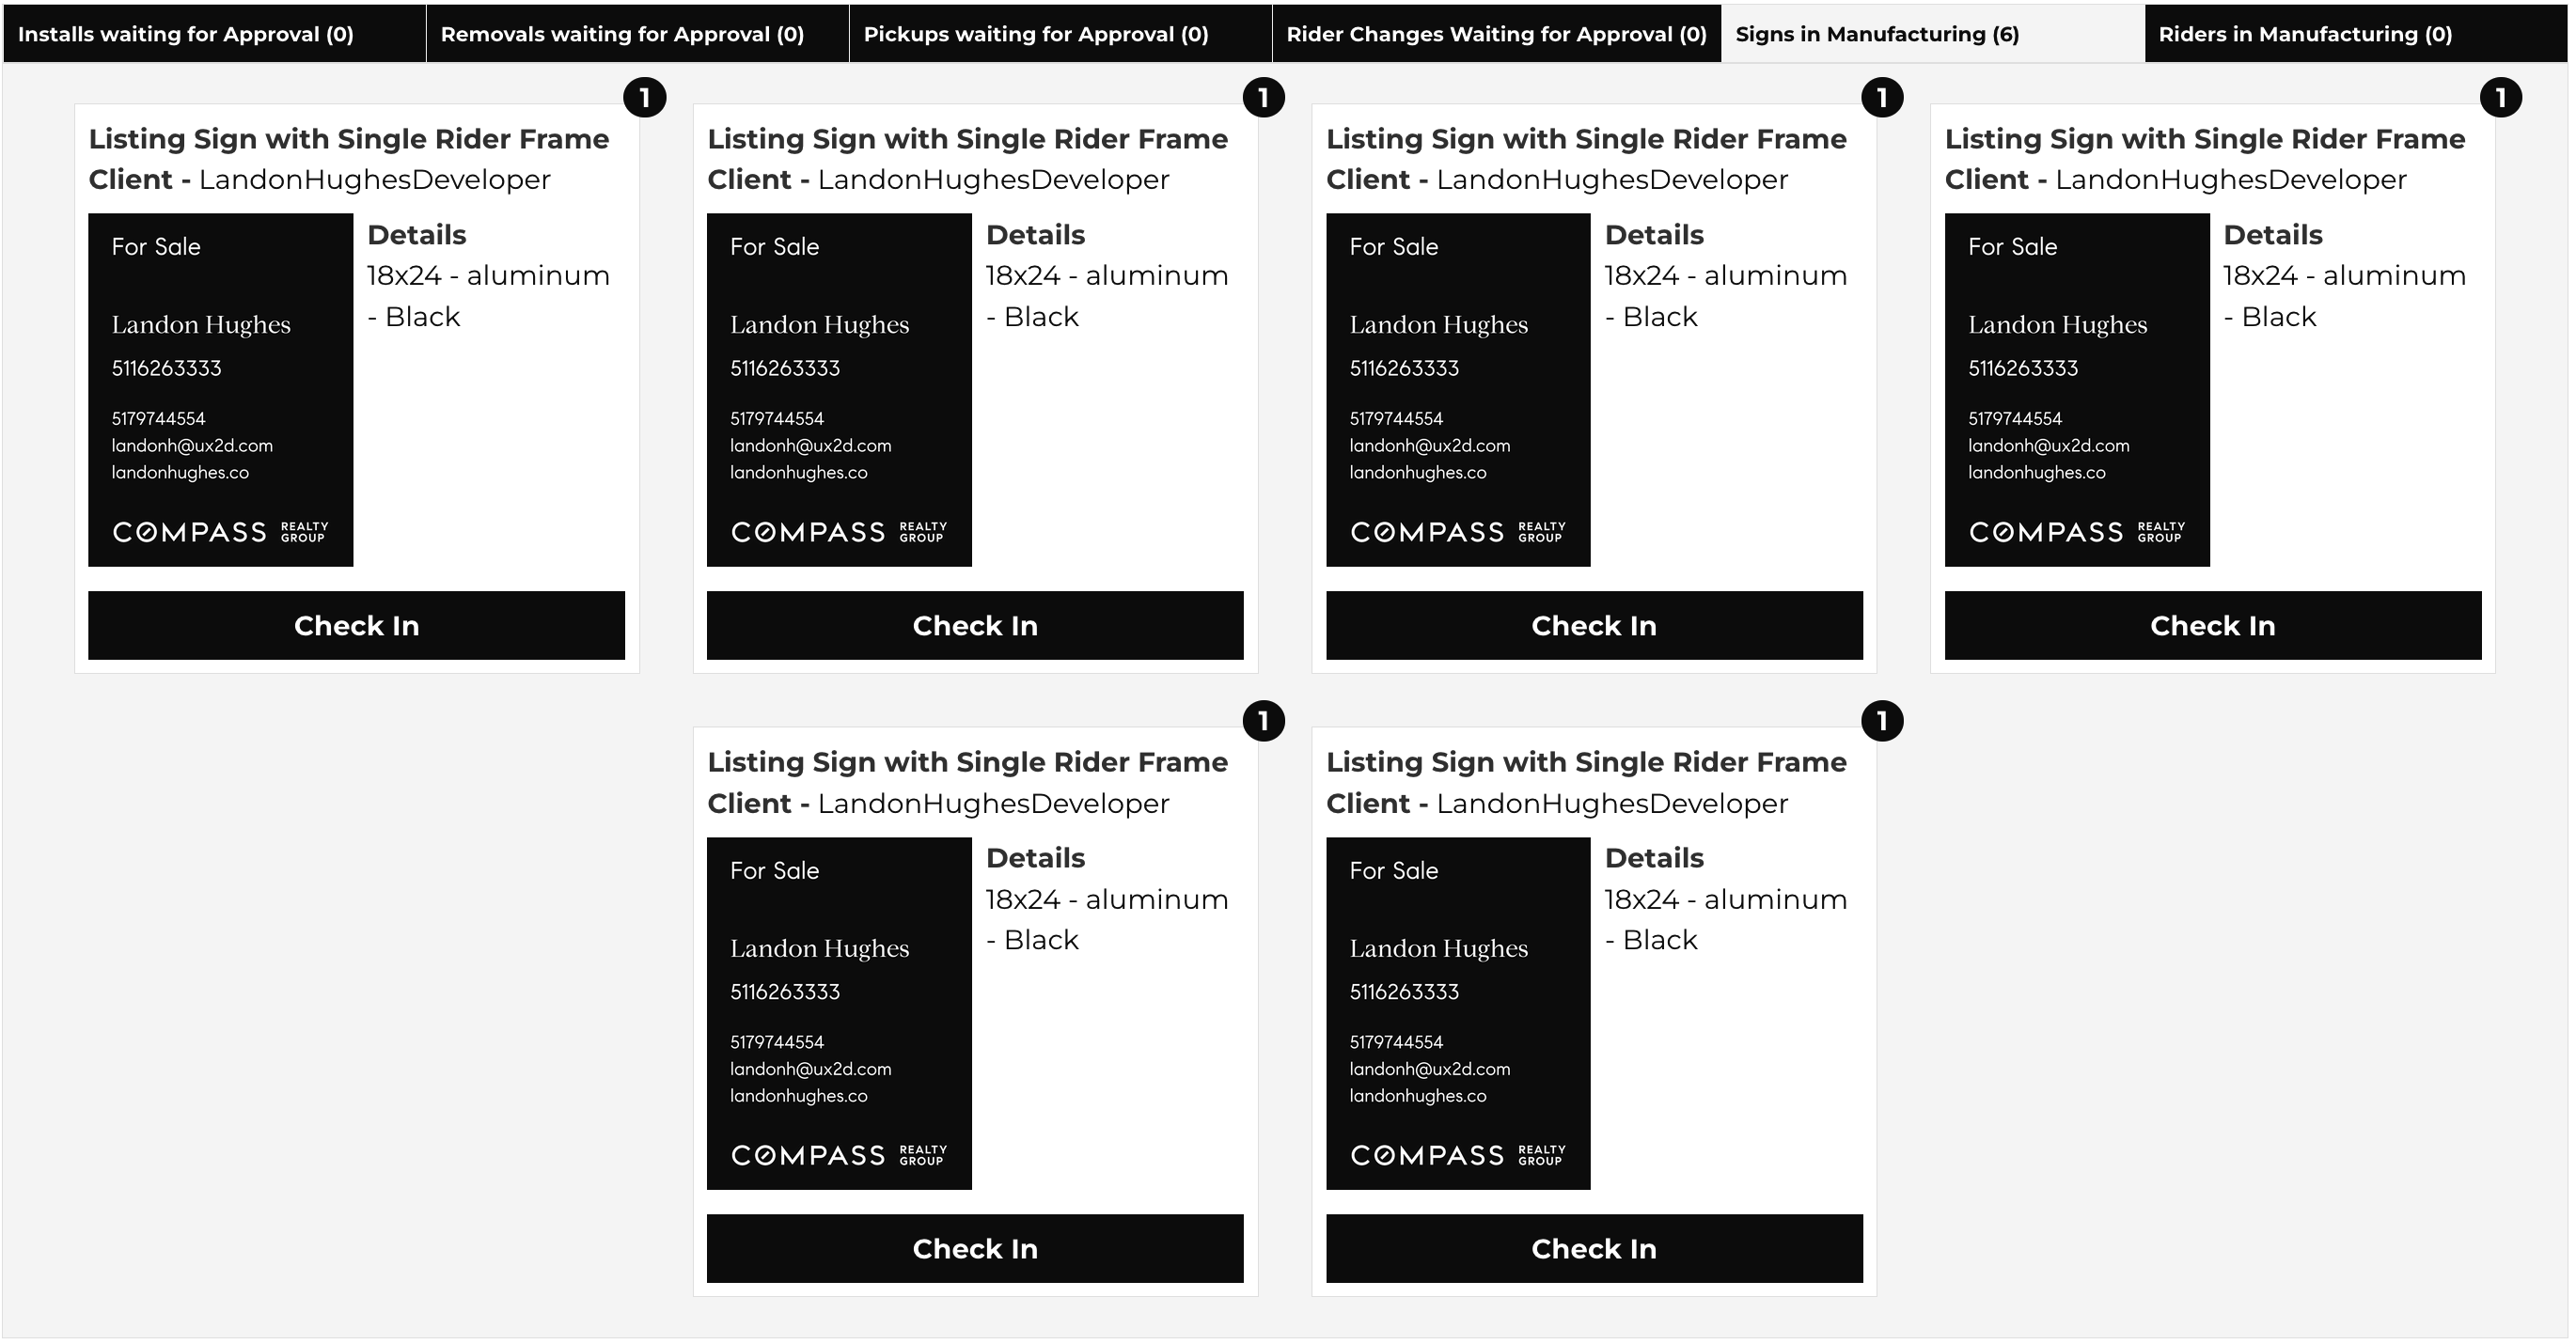
- Click on either or.
- If we just received the sign or rider, double-check who the sign or rider is for, the sign type, the size, the material, and color.
- If all those details match the sign or rider we received, click on "Check in".
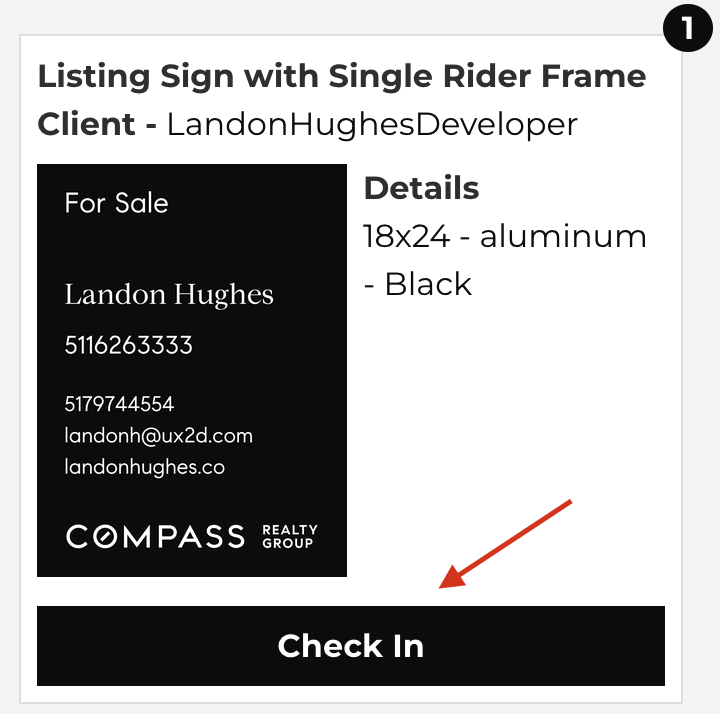
- You have successfully checked-in a sign/rider!
How do I install a sign?
- In the bottom right-hand corner of your screen, you will see an admin action menu. Click it.
- The menu will slide-up giving you a list of admin-exclusive pages.
- Click on "Installer Dashboard". All clients who have requested an installation will appear on this page.
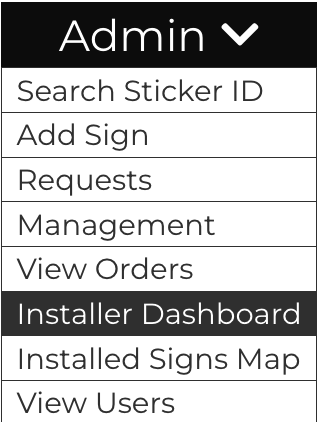
- Next, click on the "Install" button underneath the sign you'd like to install.
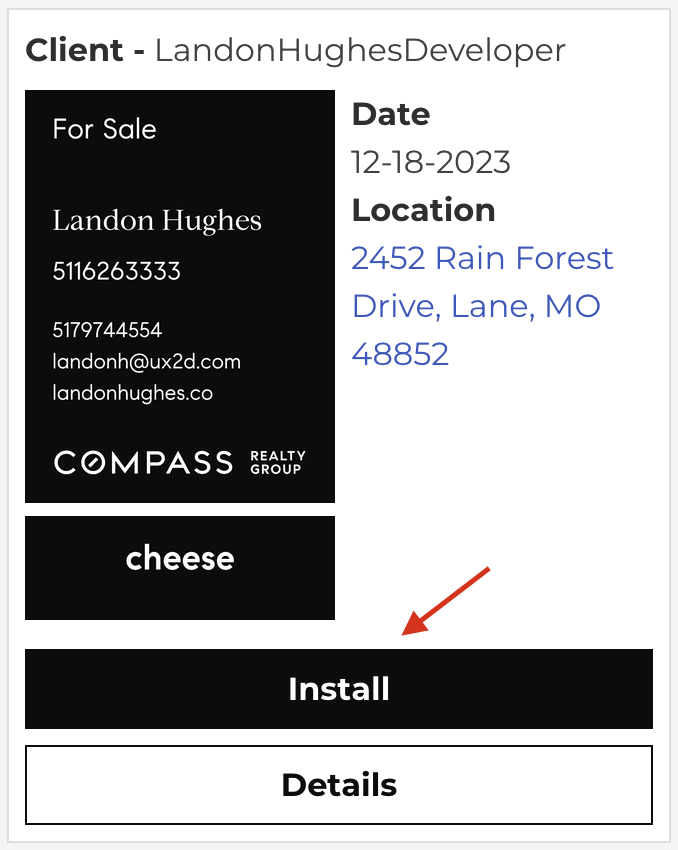
- This takes you to a page with more specific information regarding the installation request.
- On this page, there are two forms. One is for completing the installation and the other is for reporting a problem.
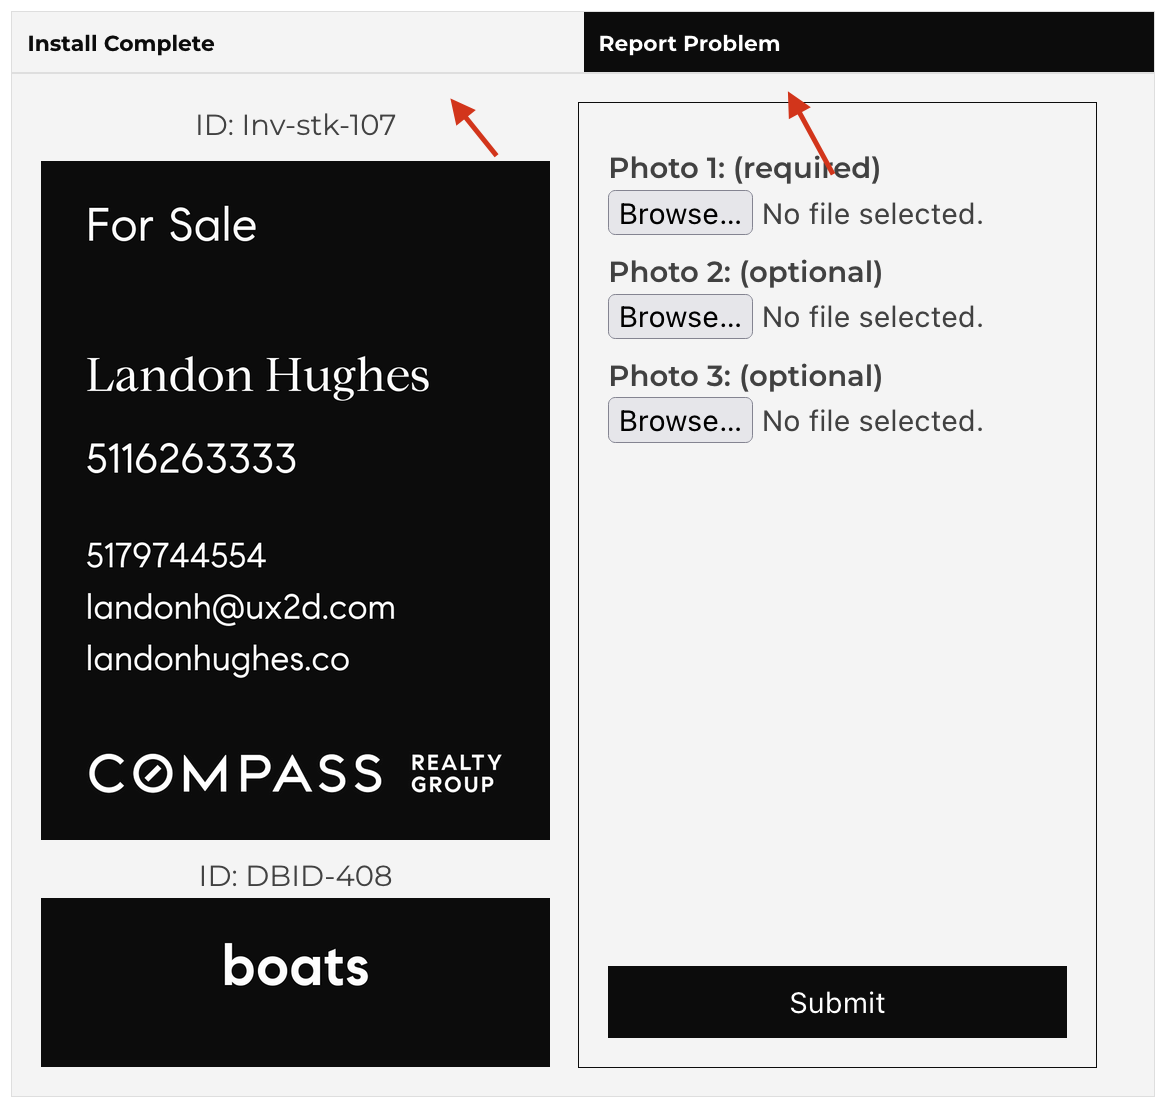
- If there is no problem with the installation, go ahead and take a picture of the sign you just installed.
Note: Driving to the installation location is required. - Once you are satisfied with the picture you just took, upload it to "Photo 1: (required)".
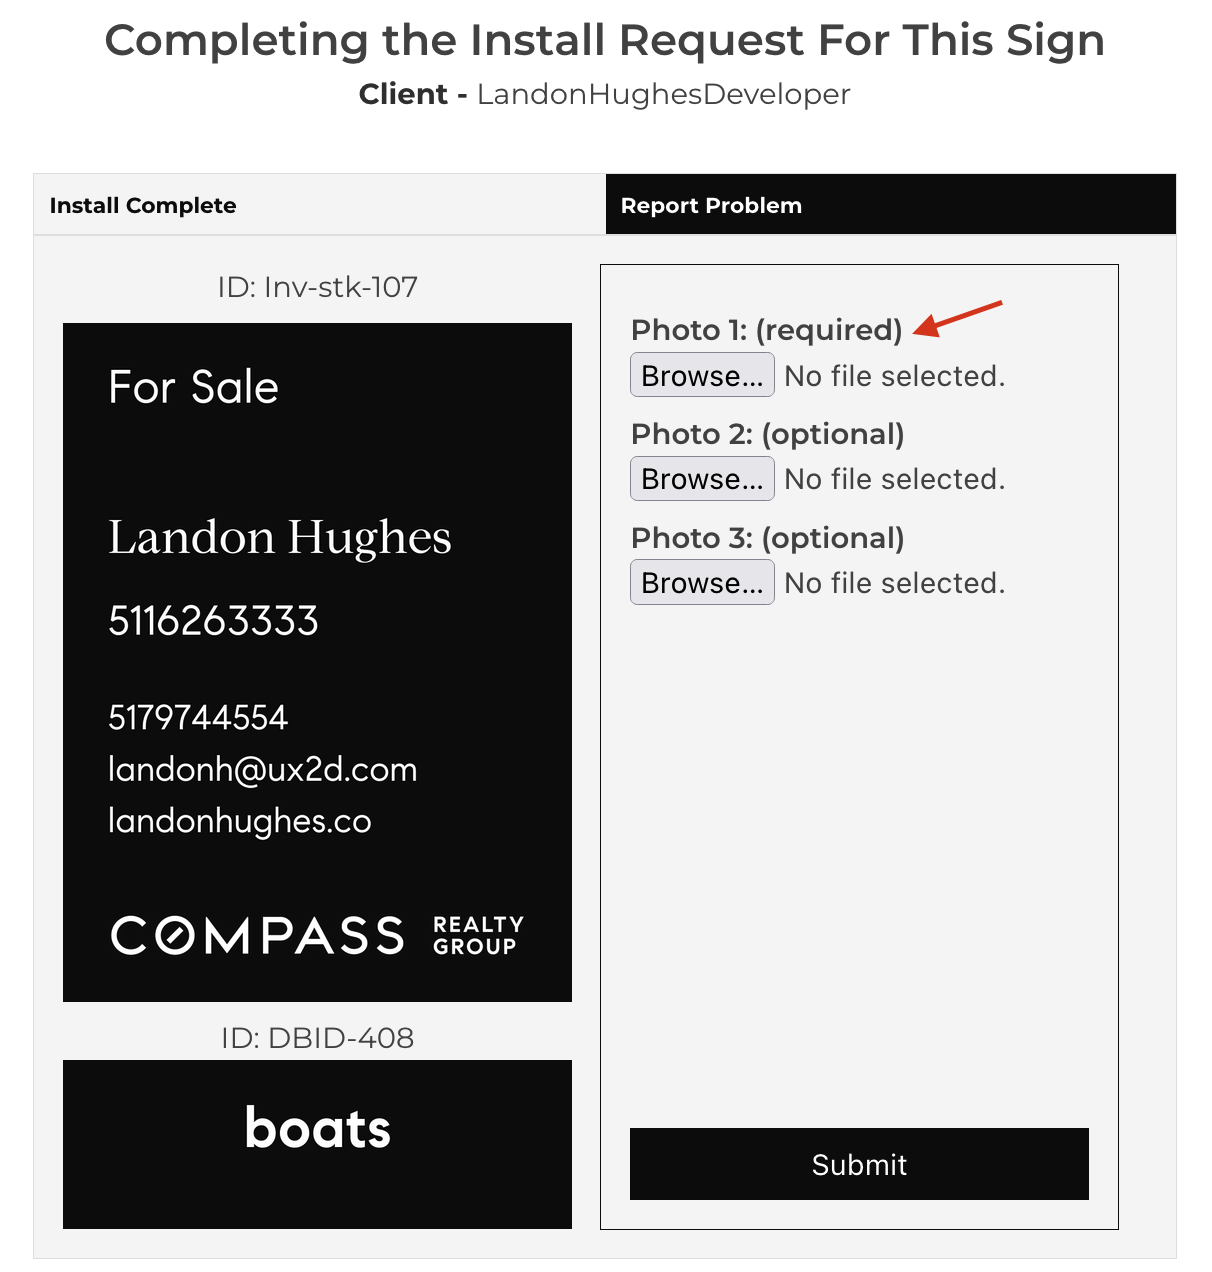
- Click "Submit".
 10. If there were no problems "clicking submit", you will see "Installation Completed Successfully" on the next page.
11. You have successfully finished and submitted an installation!

After finishing the installation, the client will receive an email indicating their sign has been installed.
There was a problem installing my client's sign. What do I do?
- From the admin action menu in the bottom right corner of your screen, click on "Installer Dashboard".

- Click on "Install" underneath the sign you are having problems with.

- You will be directed to page with two forms. The first form (Install Complete) is only if there weren't any problems with the installation.
The second form (Report Problem) is if you encountered issues during installation. Click this tab.

- All form fields on "Report Problem" are optional except for "Problem Reason". From the "select reason" dropdown, select your problem.
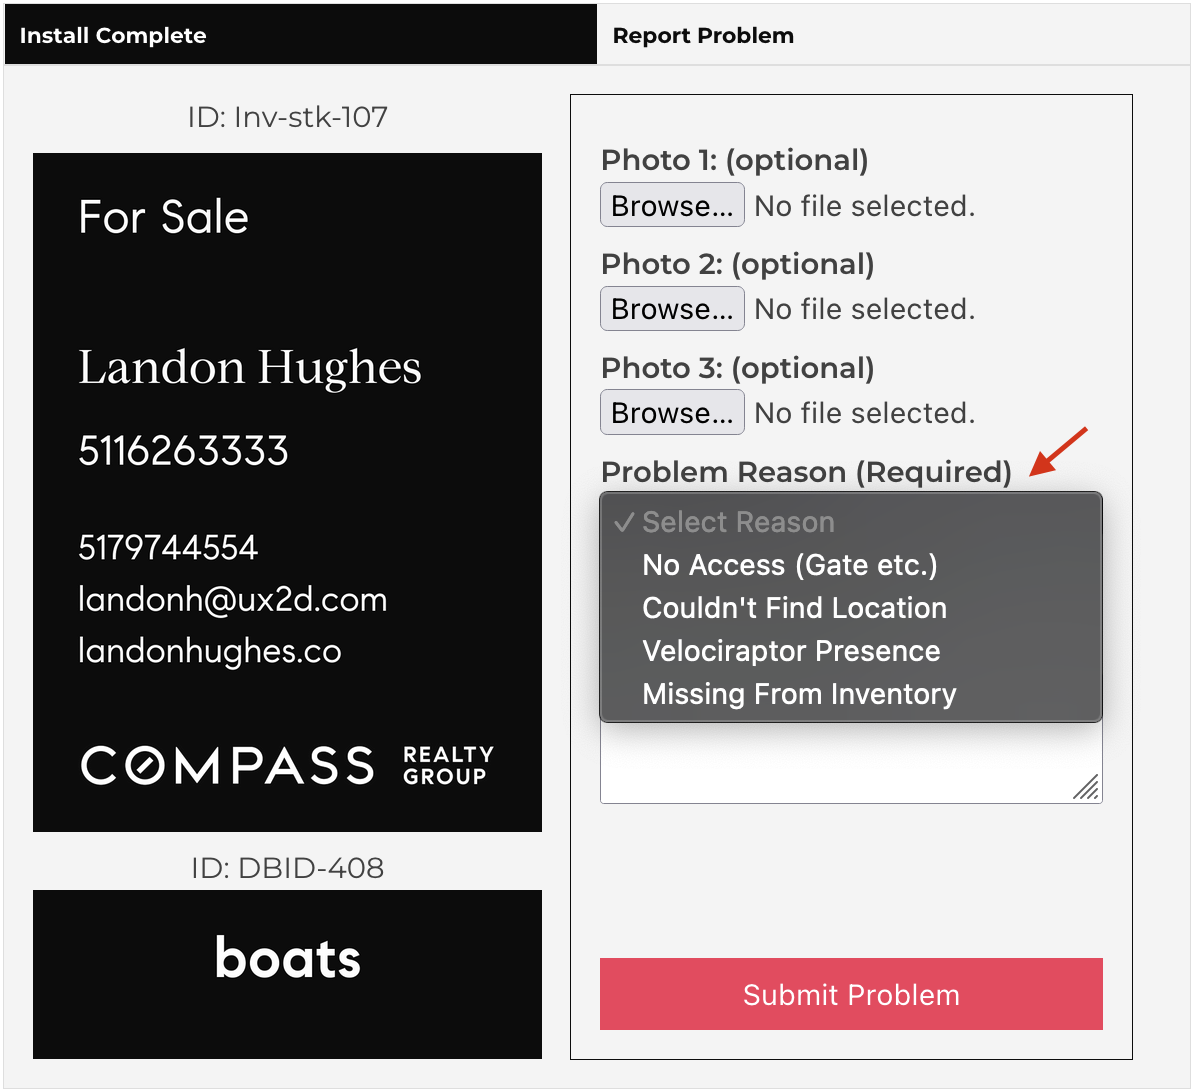
- If you have any pictures to support your current issue, please feel free to upload those in chronological order.
- If you would like to credit the trip back to the user, make sure to check "Credit Trip Back to User".

- You are also encouraged to fill out any other details about this problem under "Extra Information".
- If everything looks correct, click "Submit Problem".
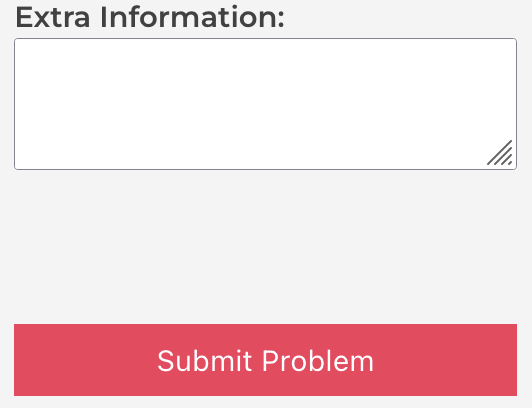
- You have successfully submitted a problem!
How do I create an installation request on behalf of a user?
- From the admin action menu, click on "View Users".
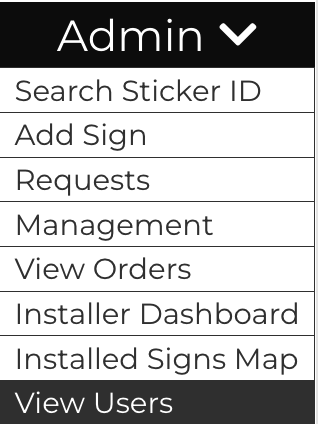
- Find the user you'd like to create the installation request for then tap on their username.

- This page shows you their inventory. Next, click on the "My Signs" tab if you are not there yet.
- Make sure to click on "Toggle Packing" to ungroup like signs.

- Find the sign you'd like to install for the client.
- Once you have selected a sign you'd like to install, click on "Schedule Install" underneath that sign.
- You are now brought to a form with all the specifics as to where the sign should be installed.
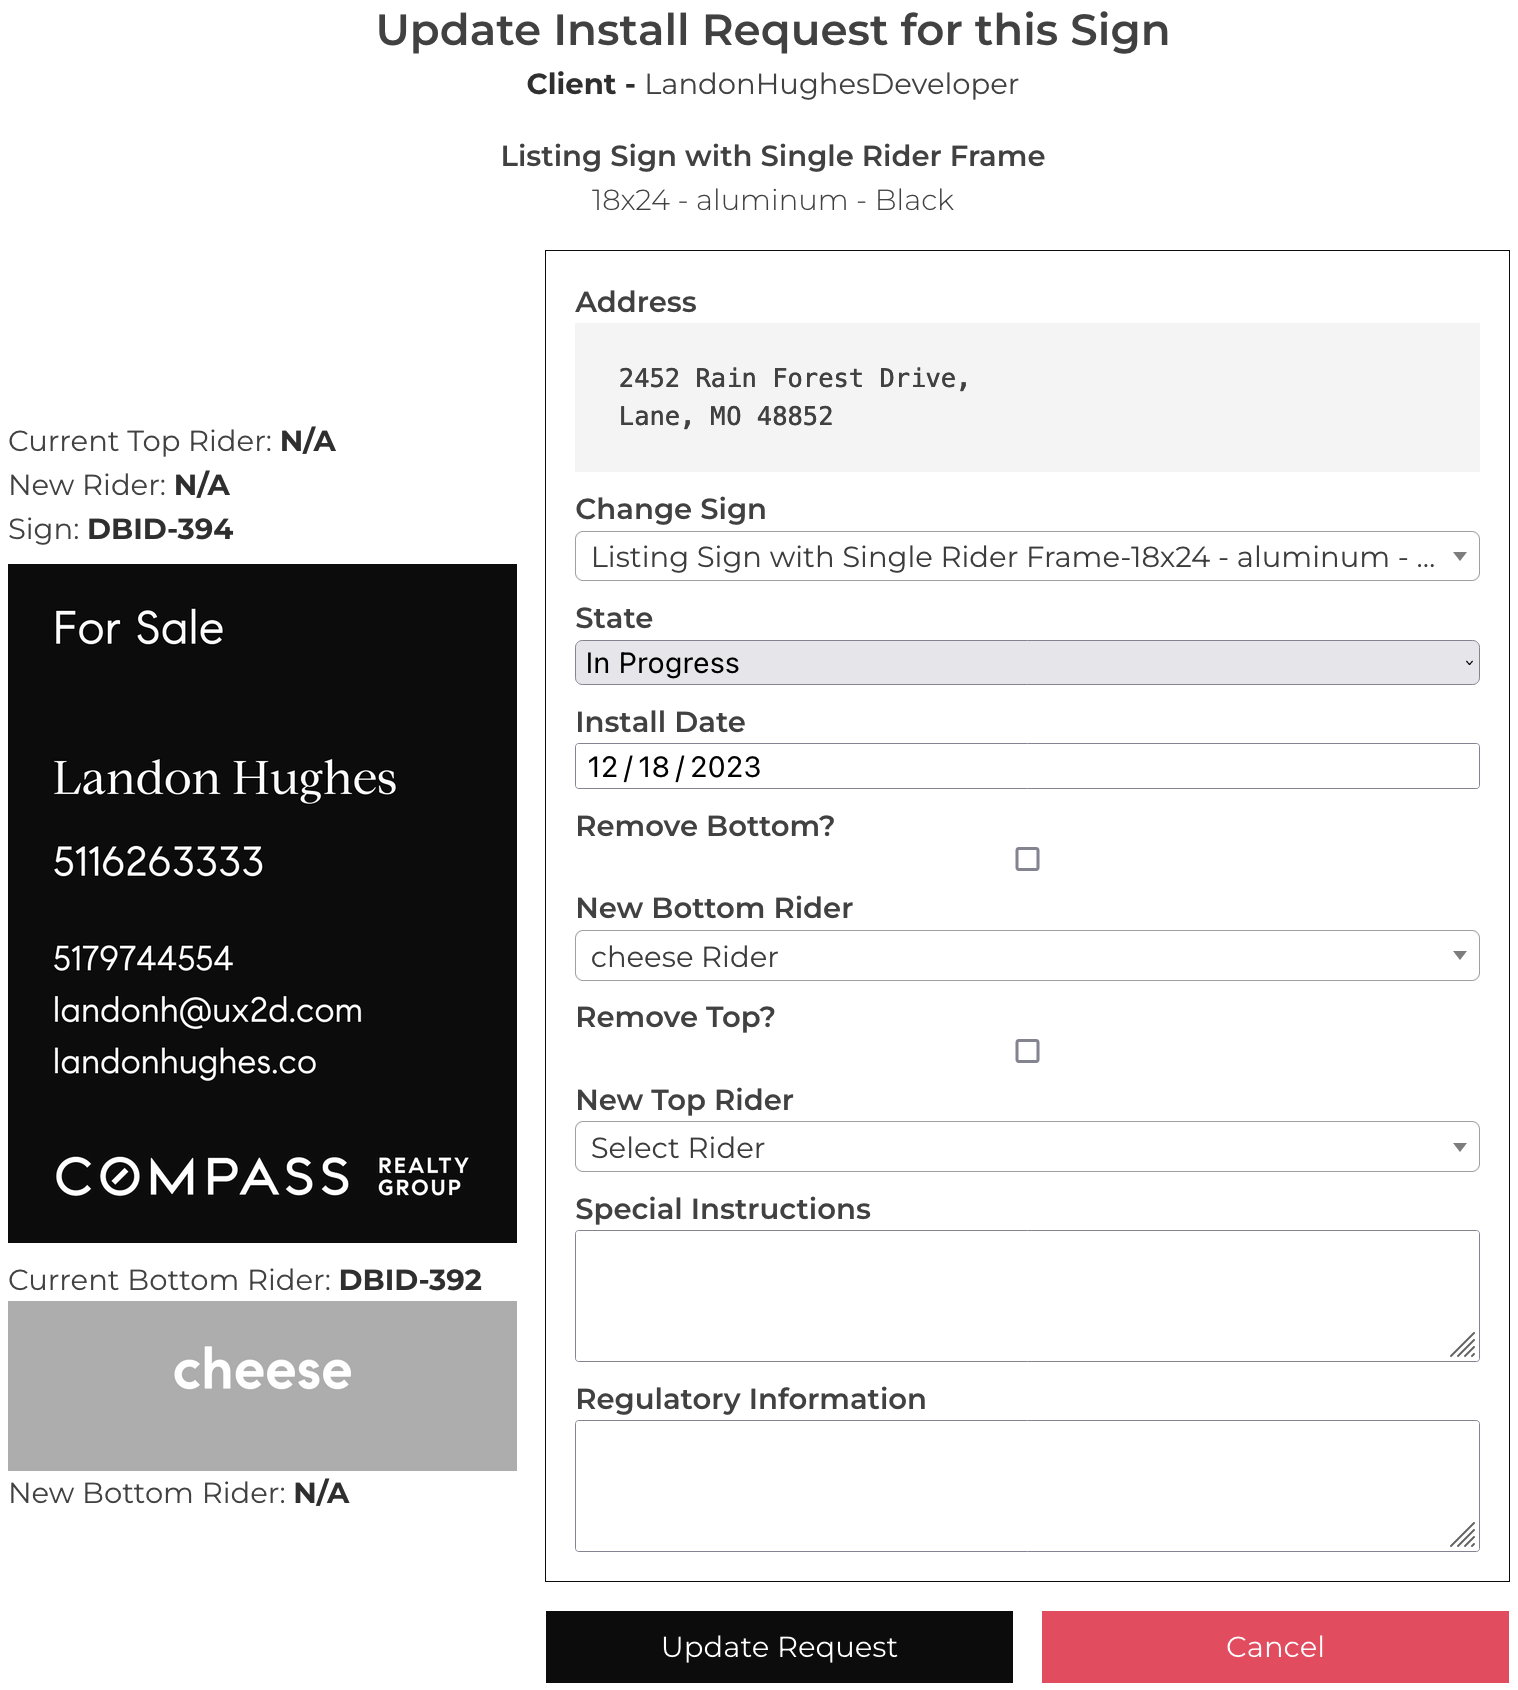
- Go ahead and fill out all required information in addition to a top and/or bottom rider if the sign needs one.
- If everything looks correct, click on "Submit Request".

- You will be taken to an accuracy confirmation page. Please double-check to make sure all information looks correct.
- If something doesn't look correct, tap "It's not accurate". You will be taken to the previous page to correct your installation information.
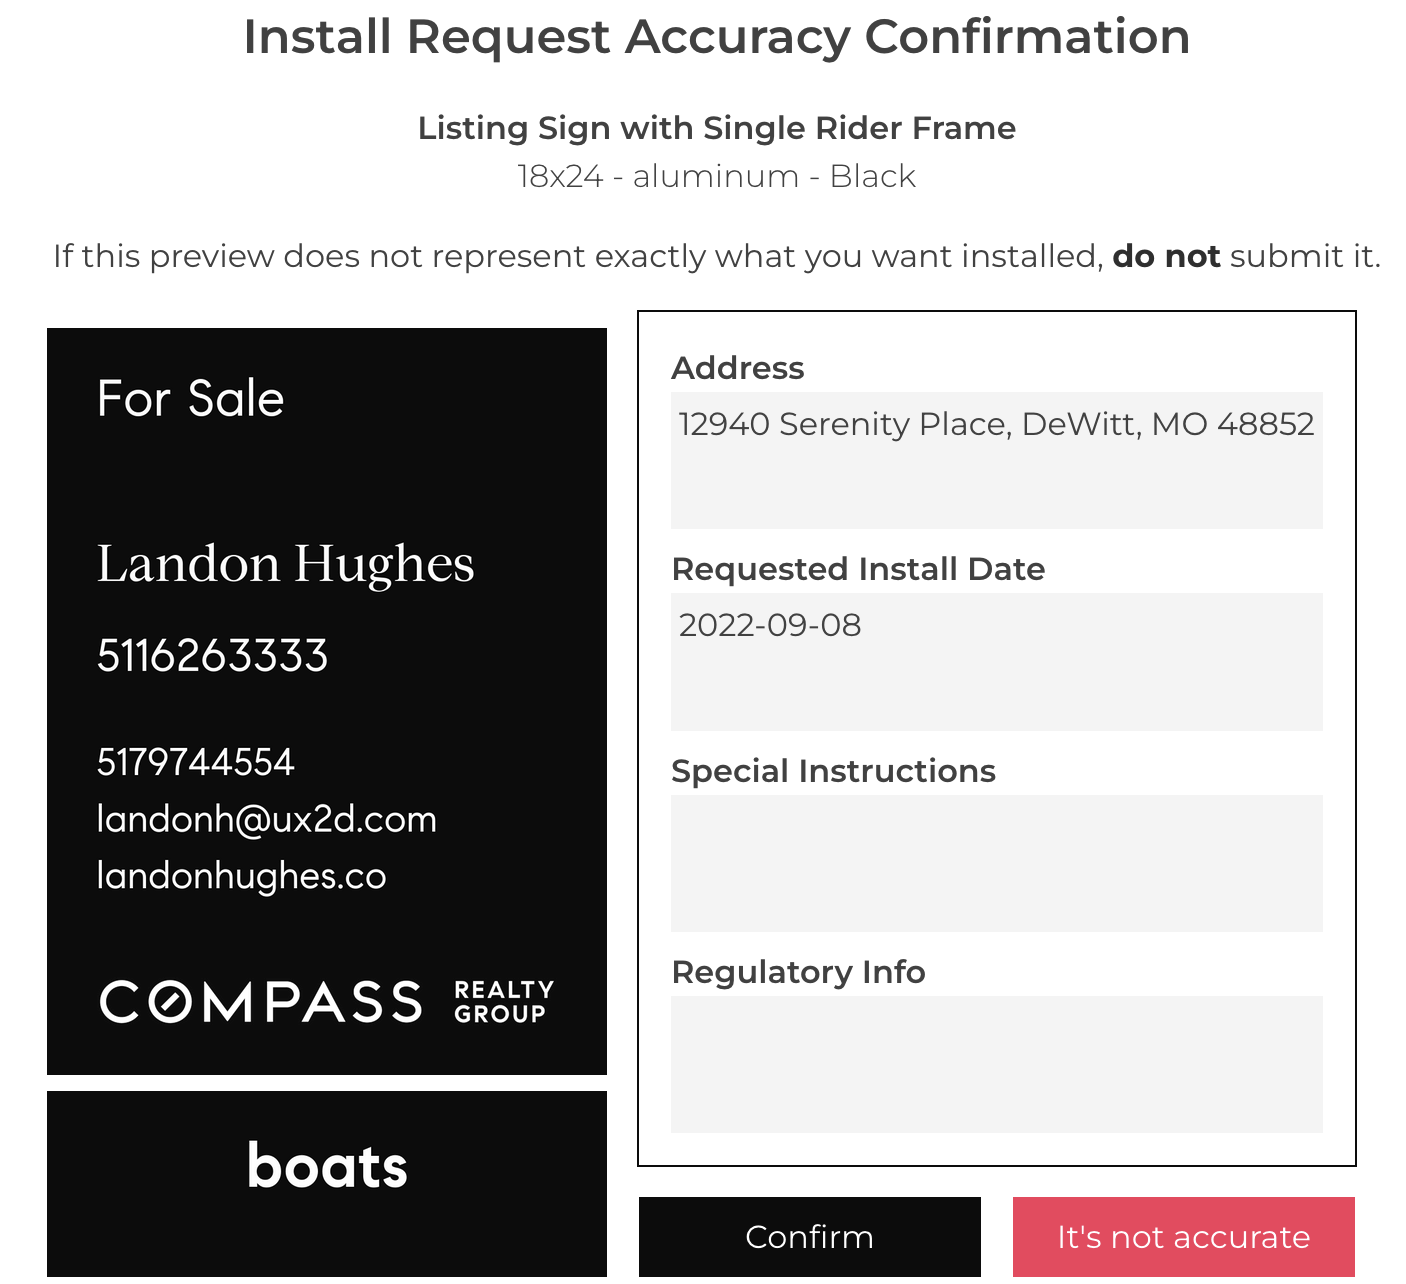
- If everything looks good, hit "Confirm".
- You have successfully submitted an installation request for a user!
How do I submit a removal request on behalf of a client?
- From the admin action menu, click on "View Users".

- Find the user you'd like to create the removal request for then tap on their username.
- This page shows you their inventory. Next, click on "My Installed Signs".

- If a sign has been installed, you will see a "Schedule Removal" button underneath the sign.
- Please find the sign you'd like to remove, then click "Schedule Removal".
- On this page, you will specify the removal date and any "special instructions" or notes (if you have any).
- Once you have specified a removal date, click "Schedule Removal".
- You have successfully created a removal request for a client!
How do I submit a rider change request on behalf of a user?
- From the admin action menu, click out "View Users".

- Find the user you'd like to create the rider change request for then tap on their username.
- This page shows you their inventory. Next, click on "My Installed Signs".
- If the sign has been installed, you will be given the ability to change one of the top or bottom riders.
- Click on "Rider Change" underneath the sign you'd like to complete a rider change request for.

- On this page you will see a "Change Date" input field. Please fill in the date for the rider change.
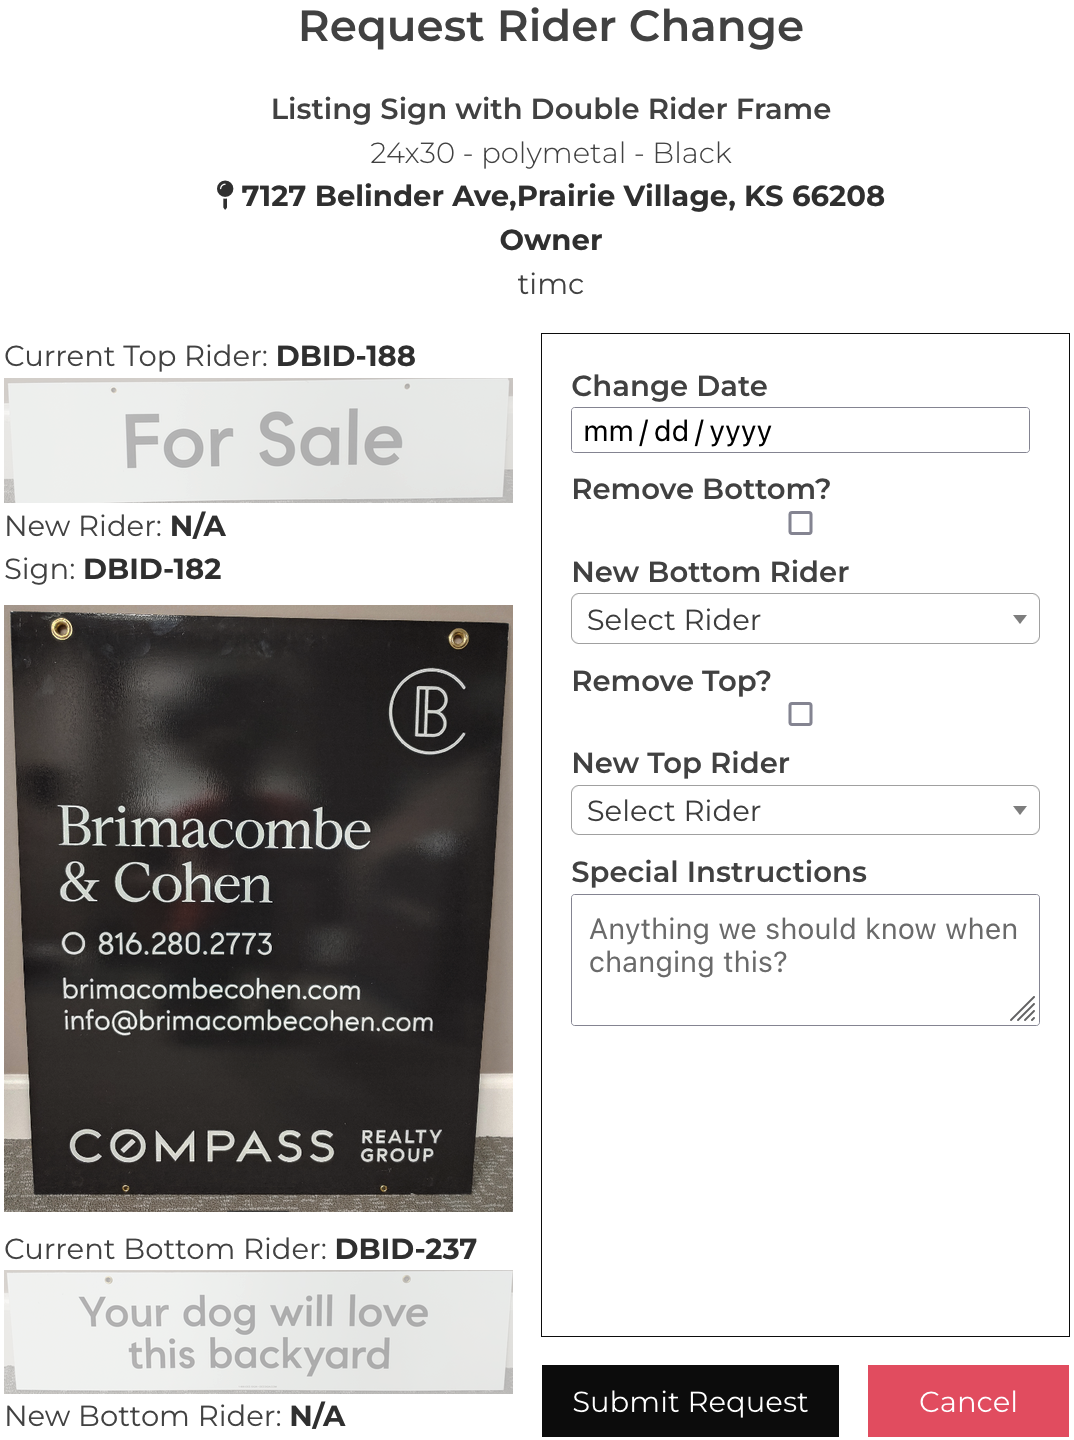
- To go along with the previous step, please check whether the bottom rider or top rider will be removed. This is denoted with a checkbox.
- If you need to swap out the bottom or top riders, under "New Bottom Rider" or "New Top Rider", please select the new rider(s) to replace to old ones.
- If everything looks correct, go ahead and click "Submit Request".
- You have successfully submitted a rider change request for a client!
Is there a way to see where a sign was installed on a map?
- From the admin action menu, click on "Installed Signs Map".
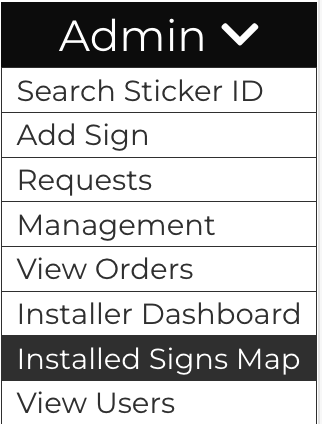
- On this page you will see all signs that are currently installed. You can use the "plus" and "minus" buttons on the left of your screen to zoom in and out.

- You can also use the scroll wheel on your mouse to zoom in and out of the map.
- If you have a general idea where the sign was installed, go ahead and click one of the blue markers on the map.
- After clicking one of the blue markers, you will see a popup. This popup contains the location of the installed sign, the sign details, install details, and who the sign belongs to (Client).
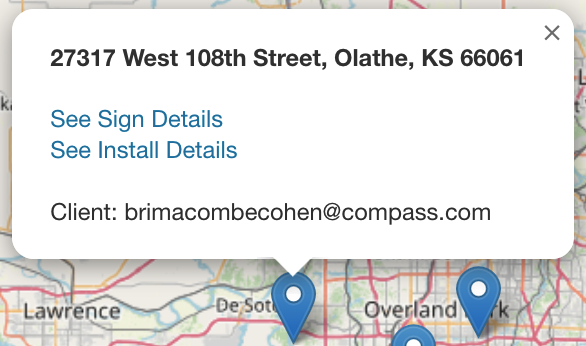
- To double-check if you found the correct sign location for your desired sign, click on "Install Details". This will give you more concrete information as to where your sign is at and what it looks like.
How do I update an install request?
- From the admin action menu, click on "Requests".

- You are now brought to a page with all requests received. Click on the "Install Requests" tab if you are not already there.

- Find the address and the corresponding user you would like to update the installation request for.
- Once you have your desired user and address picked, click on "Link".
- You are now brought to the installation detail page.
- Go ahead and click "Update this request".
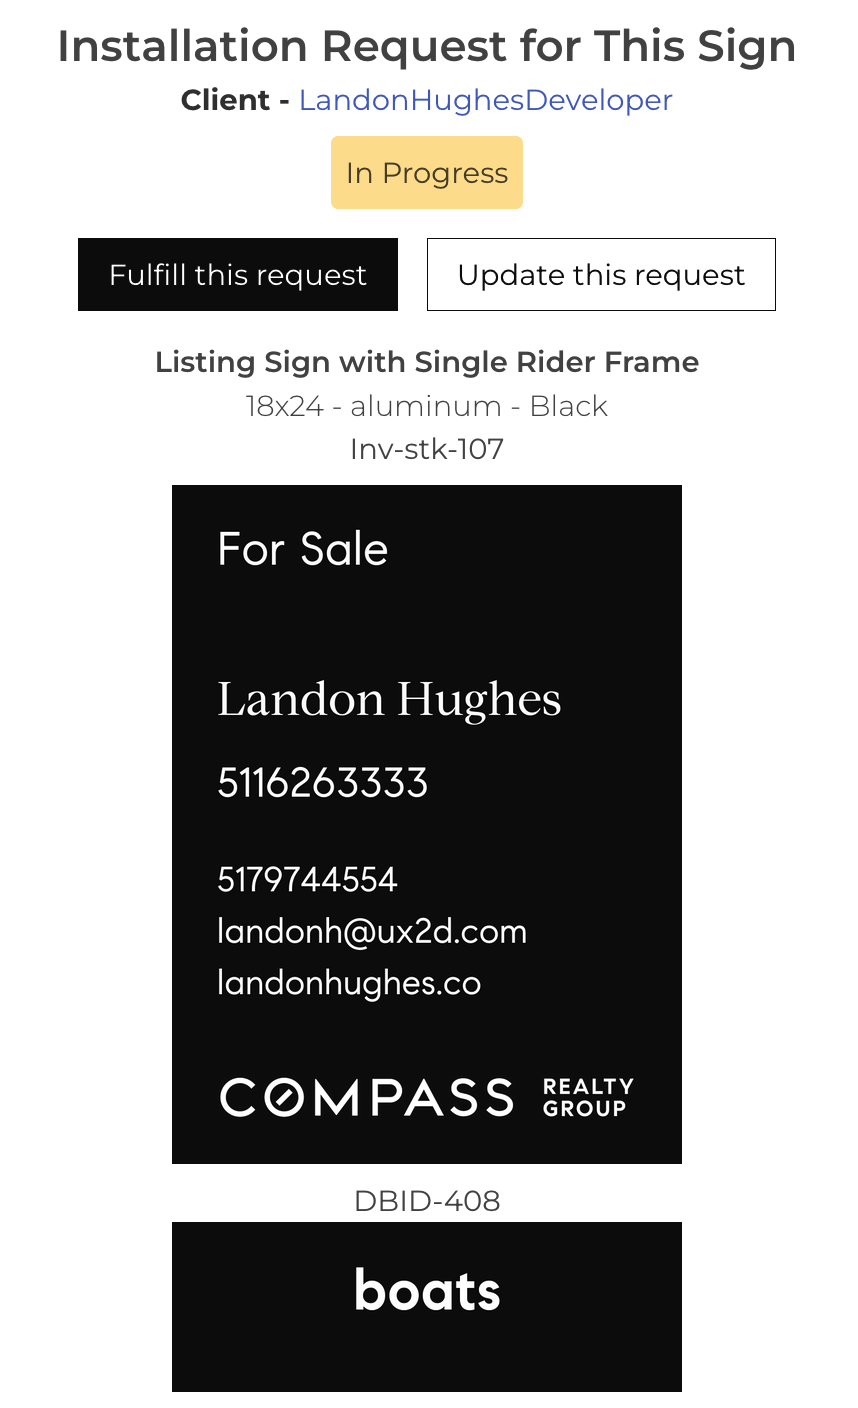
- You are now brought to a page with all the details about the installation request.
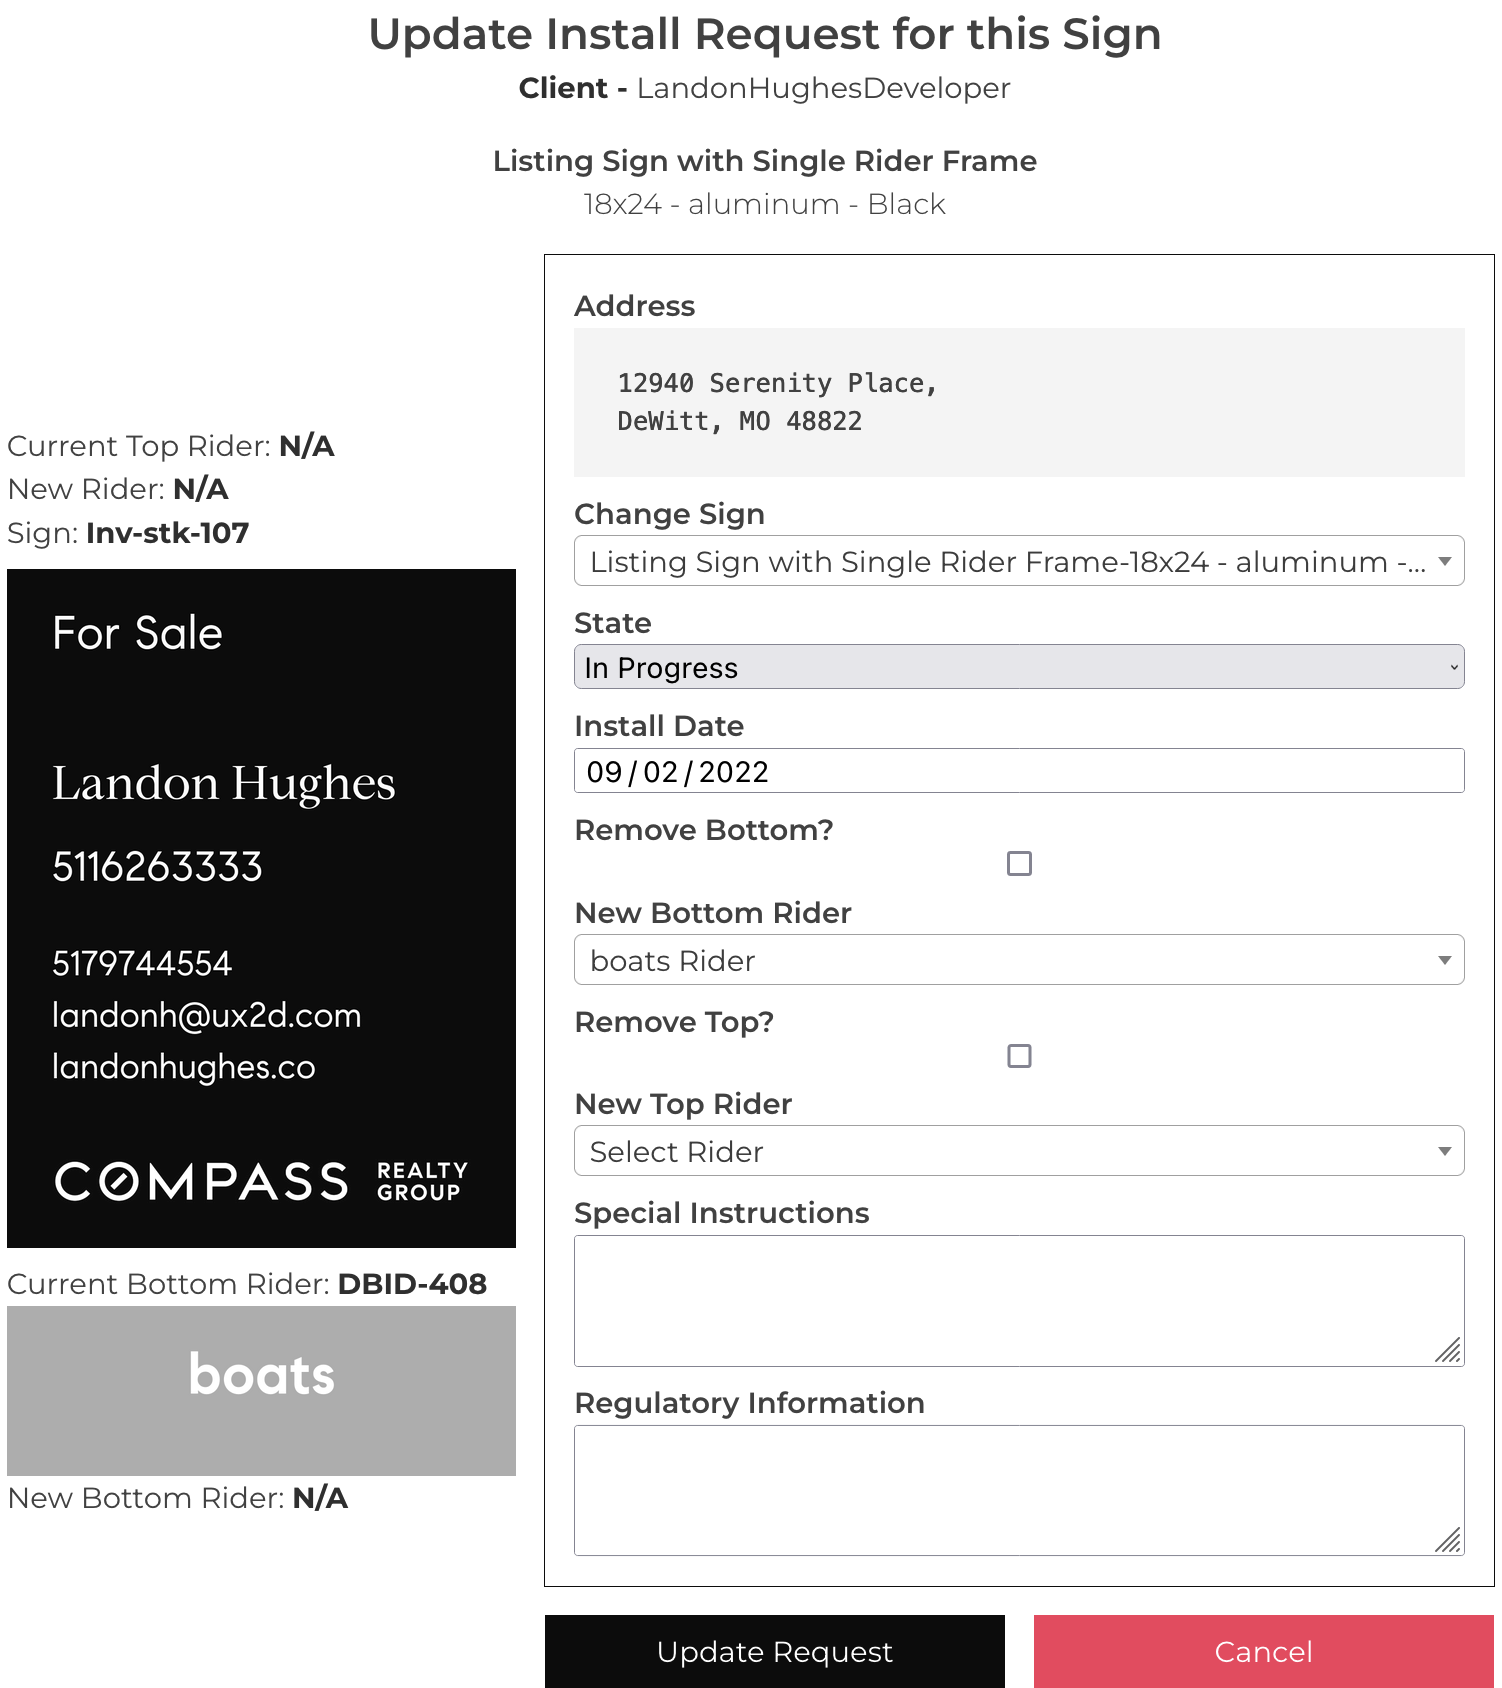
- Please modify any of the given attributes. The attributes you can change are the sign itself, the current state of the sign, the installation date, removing the bottom and top riders in addition to adding a new top or bottom rider(s).
- Once you are satisfied with the modifications, go ahead and click "Update Request".
- If all went well, you should be brought back to the installation detail page.
- You have successfully updated an installation request!
How do I update a removal request?
- From the admin action menu, click on "Requests".
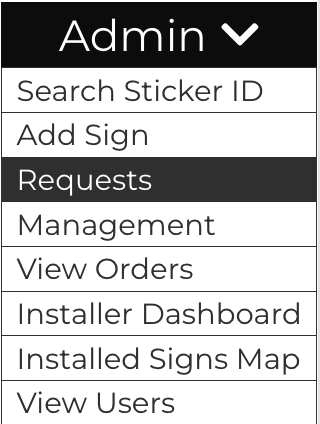
- You are now brought to a page with all requests received.
Click on the "Removal Requests" tab if you are not already there.

- Find the address and the corresponding user you would like to update the removal request for.
- Once you have your desired user and address picked, click on "Link".
- You are now brought to the removal detail page.
- Go ahead and click "Update this request".
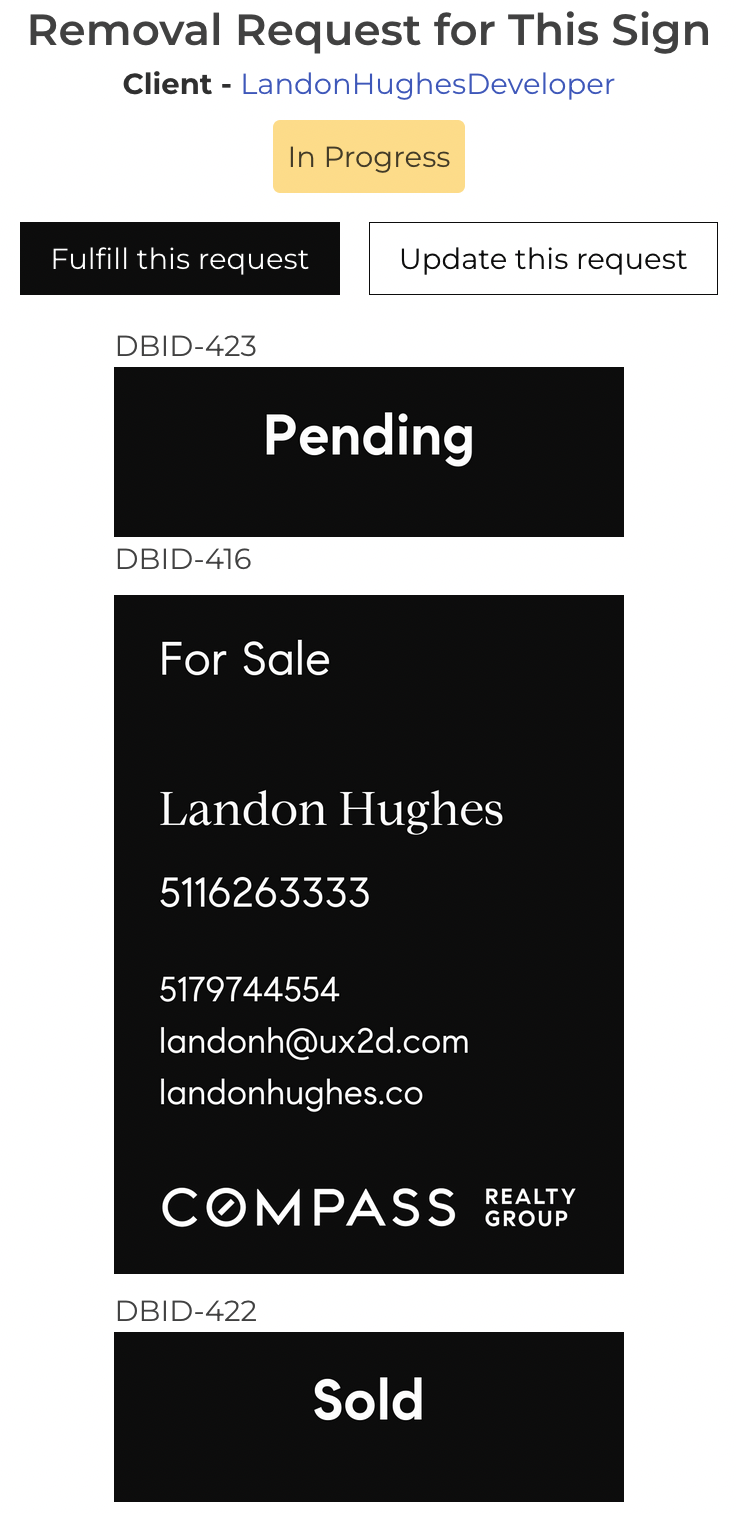
- You are now brought to a page with all the details about the removal request.
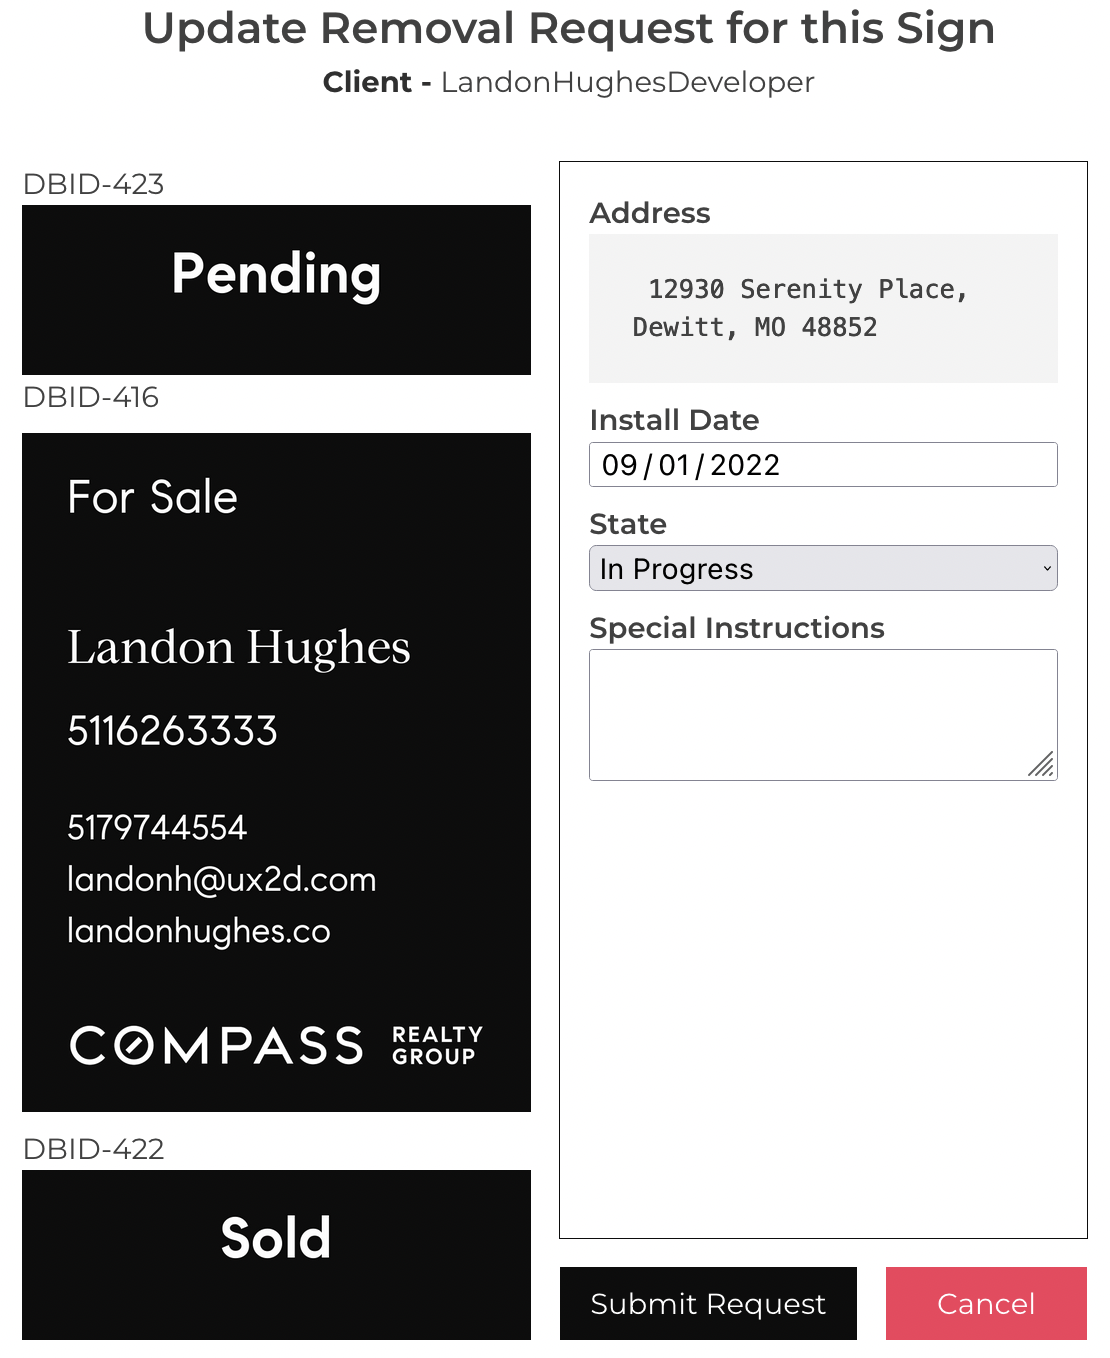
- Please modify any of the given attributes. The attributes you can change are the installation date, the state, and any special instructions
- Once you are satisfied, go ahead and click "Submit Request".
- You have successfully updated a removal request!
How do I update a rider change request?
- From the admin action menu, click on "Requests".

- You are now brought to a page with all requests received.
Click on the "Rider Change Requests" tab if you are not already there.

- Find the address and the corresponding user you would like to update the rider change request for.
- Once you have your desired user and address picked, click on "Link".
- You are now brought to the rider change detail page.
- Go ahead and click "Update this request".
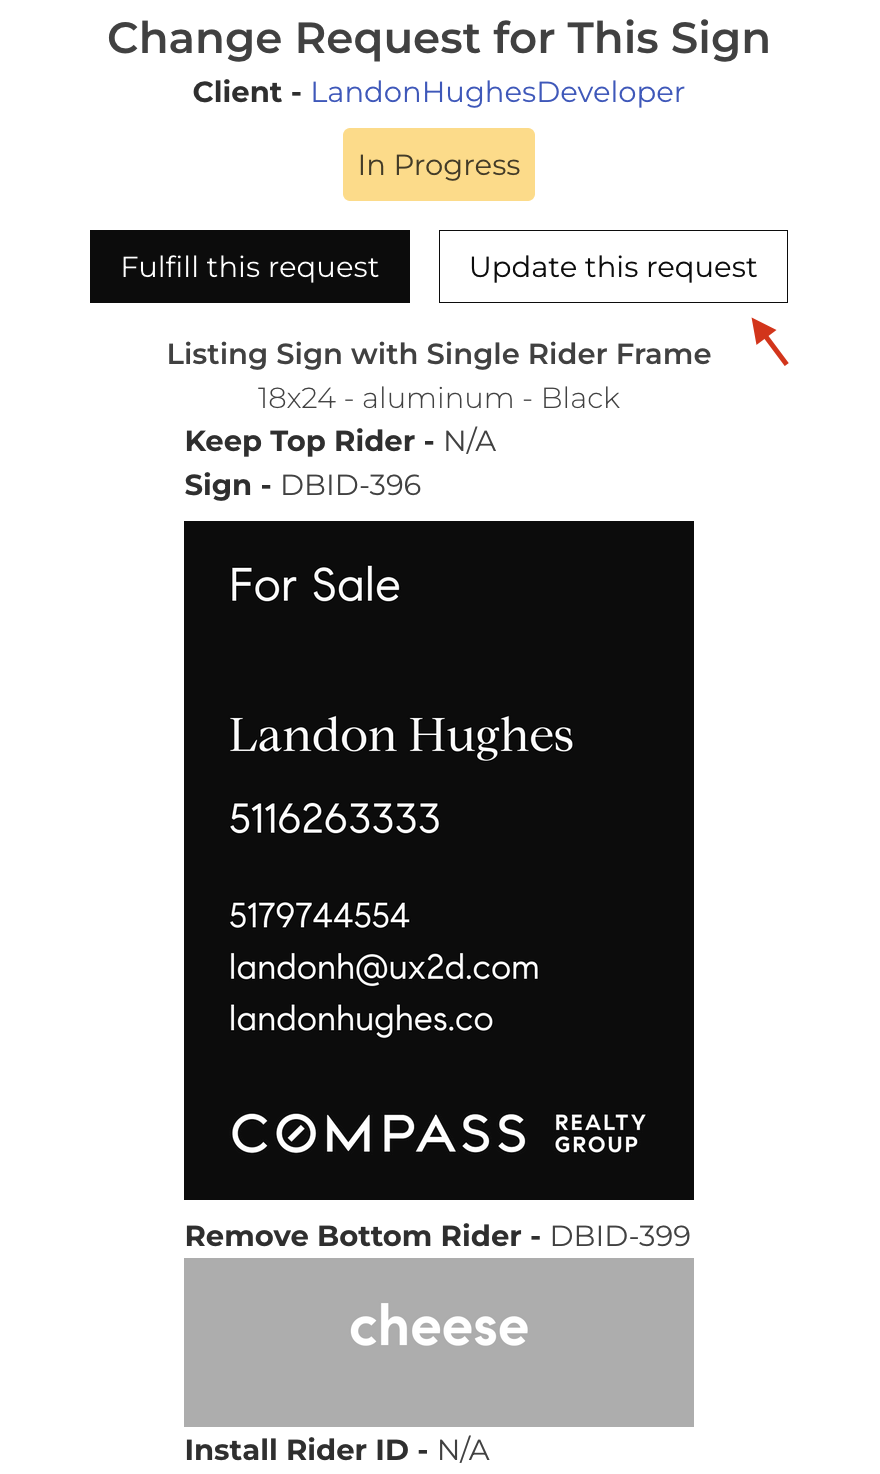
- You are now brought to a page with all the details about the rider change request.

- Please modify any of the given attributes. The attributes you can change are the sign, the current state, the change date in addition to adding and removing top and bottom riders.
- Once you are satisfied, go ahead and click "Submit Request".
- You have successfully updated a rider change request!
How do I set the sticker ID of a client sign?
- From the admin action menu, click on "View Users."

- Find the username for the client you'd like to help then click on their username.
- You are now brought to their "My Signs" dashboard.

- You may see that duplicate signs are packed together. Go ahead and click the "Toggle Packing" slider.
This ungroups similar signs so that it's easier for you to find your desired sign.

- Click the sign you'd like to add a sticker ID for.
- You are now brought to the sign detail page.
Underneath the sign title, you will see an input box along with an "Update ID" button right next to it.
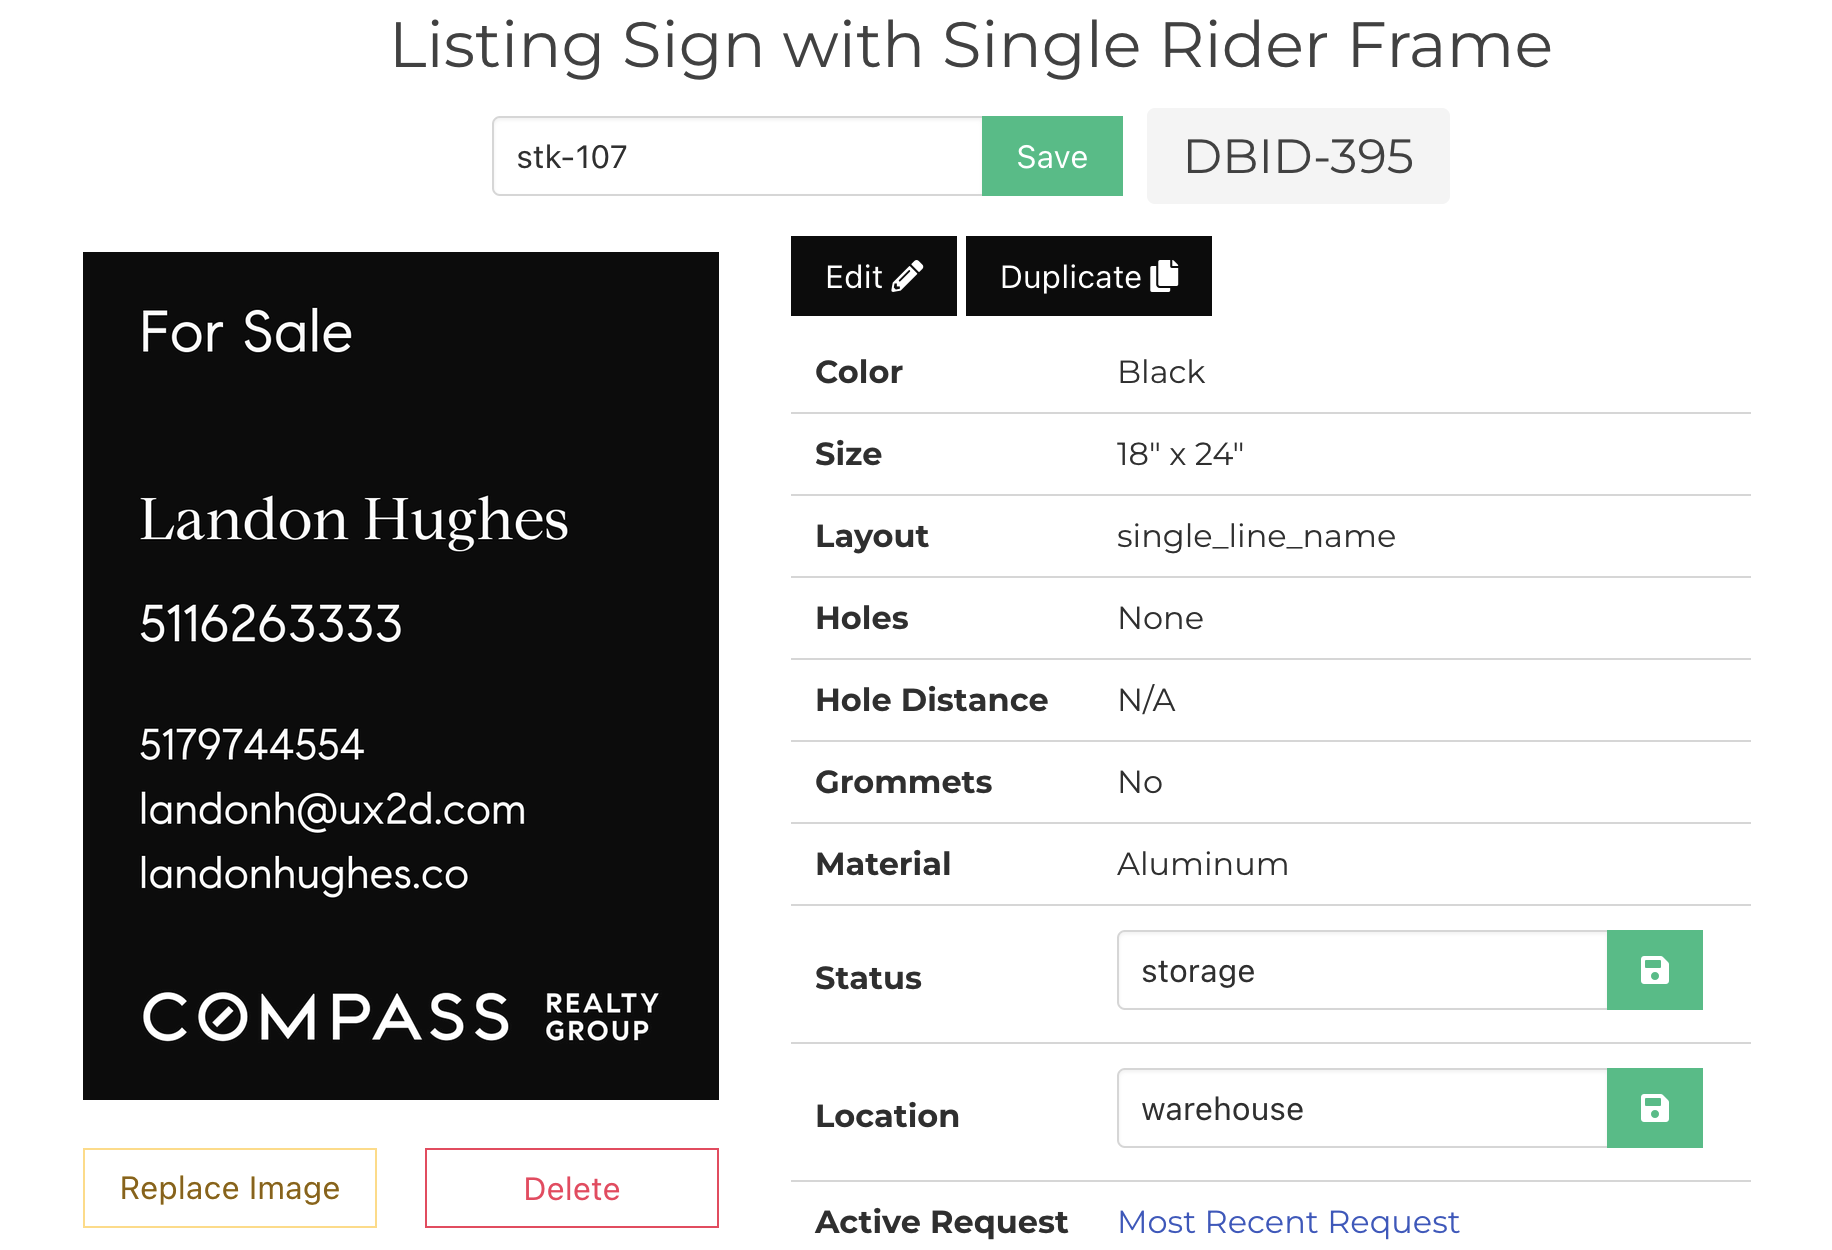
- Fill in your sticker ID then click "Update ID".
- If all went well, you should see "ID Saved" right below the input field.

- You have successfully set the sticker ID for a sign!
How do I update a pickup request?
- From the admin action menu, click on "Requests".

- You are now brought to a page with all requests received.
- Click on the "Pickup Requests" tab.
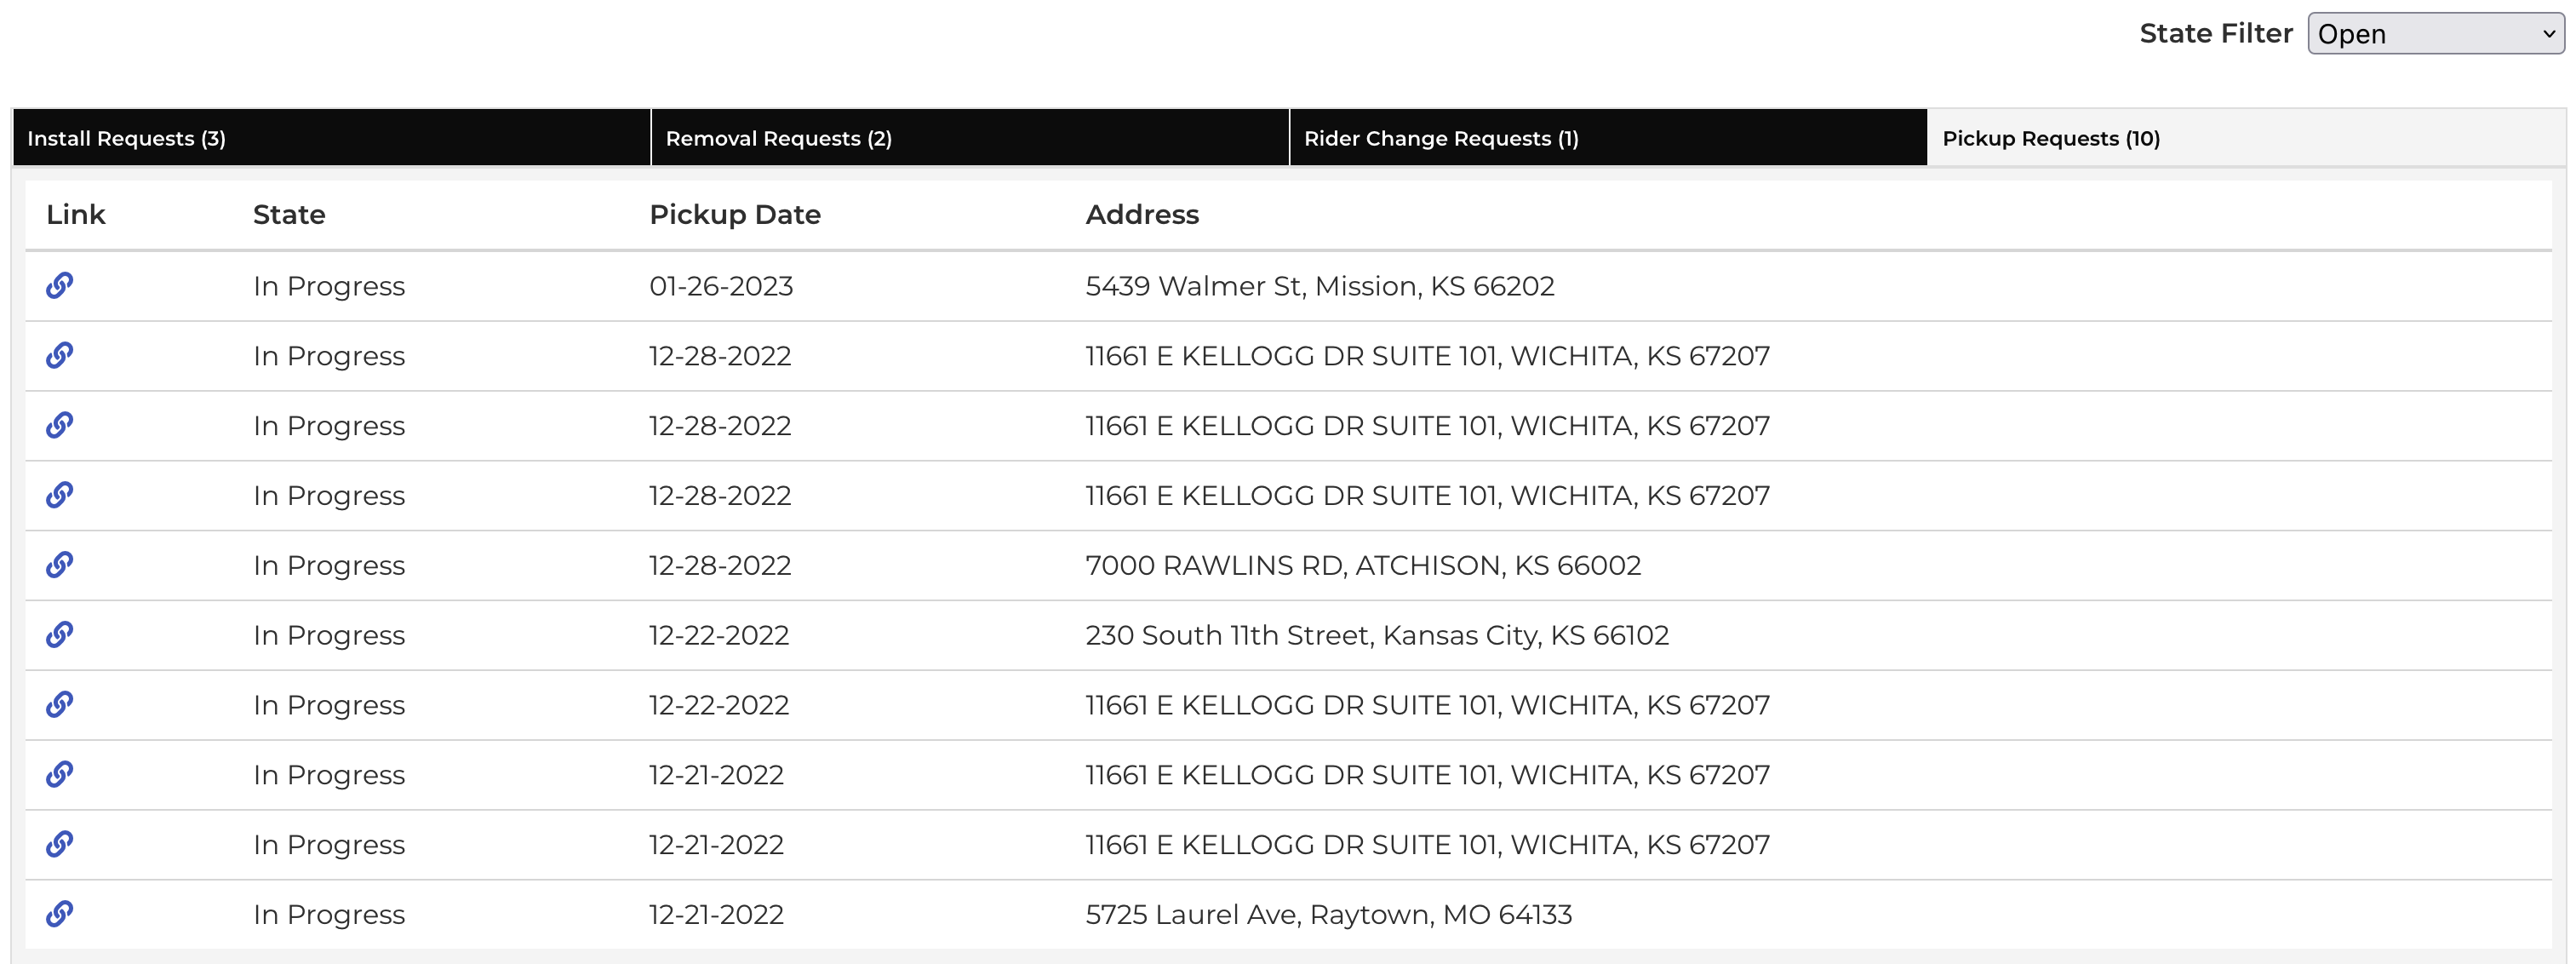
- Find the pickup request you'd like to update and click on the "link" for it
- You are now brought to the pickup request detail page.
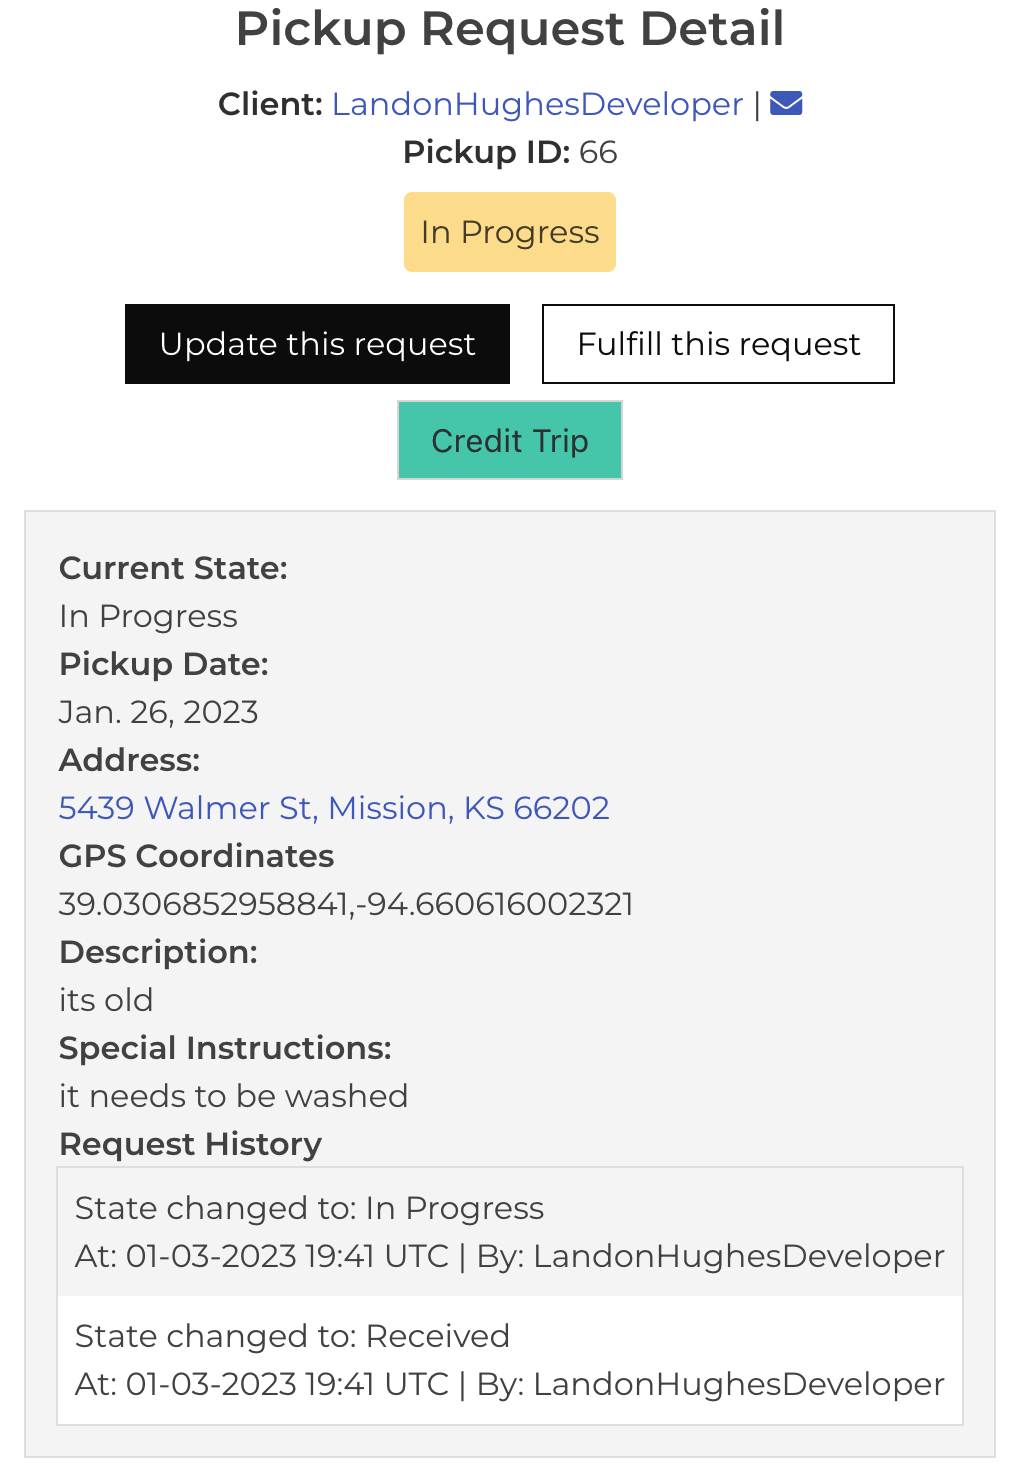
- Go ahead and click on "Update this request"
You are now brought to the "update pickup request" page.
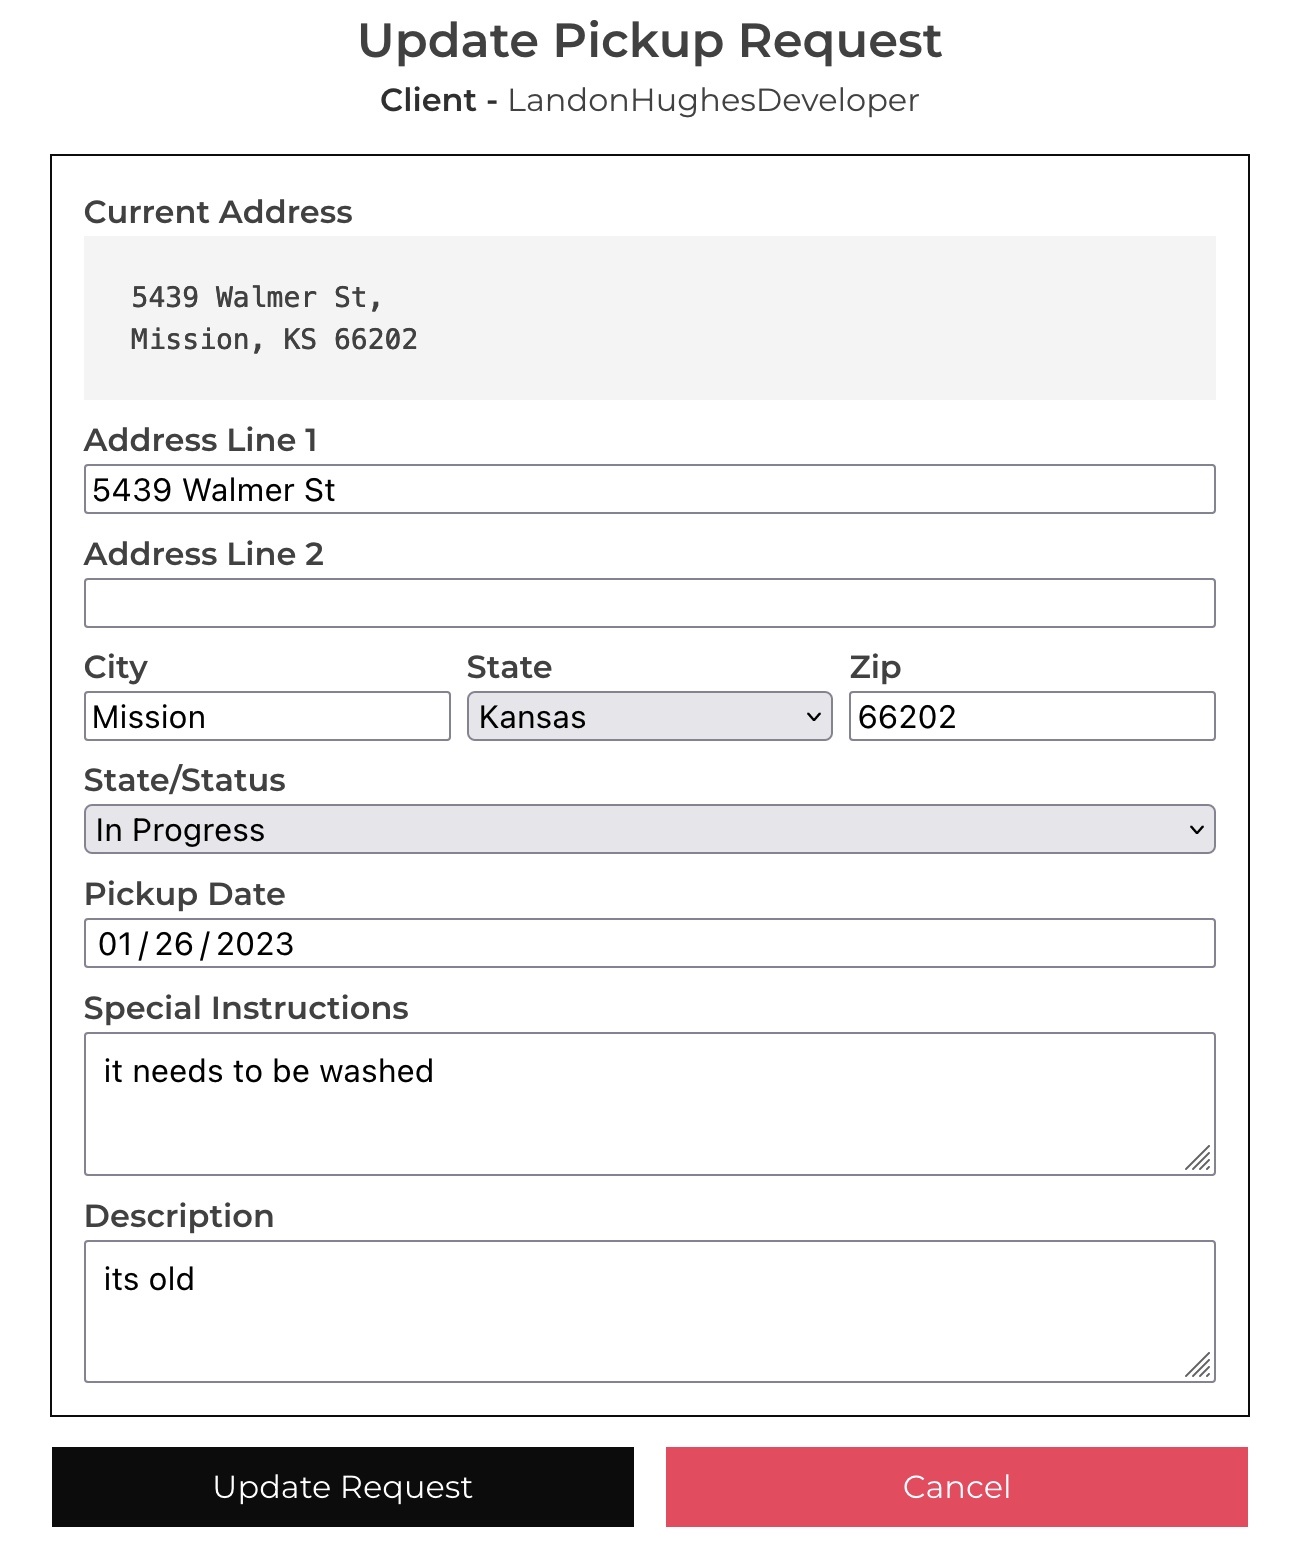
- On this page you can update the address of the request, change the state/status, pickup date, special instructions, and description.
- Once are done updating any of those fields, click "Update Request".
- You have successfully updated a pickup request!
Is there a way to view requests that need to be fulfilled "visually"?
- Yes! From the admin action menu, click on the "Scheduled Trips Map" link.
- On this page, you will see a map view of all requests that have yet to be fulfilled.
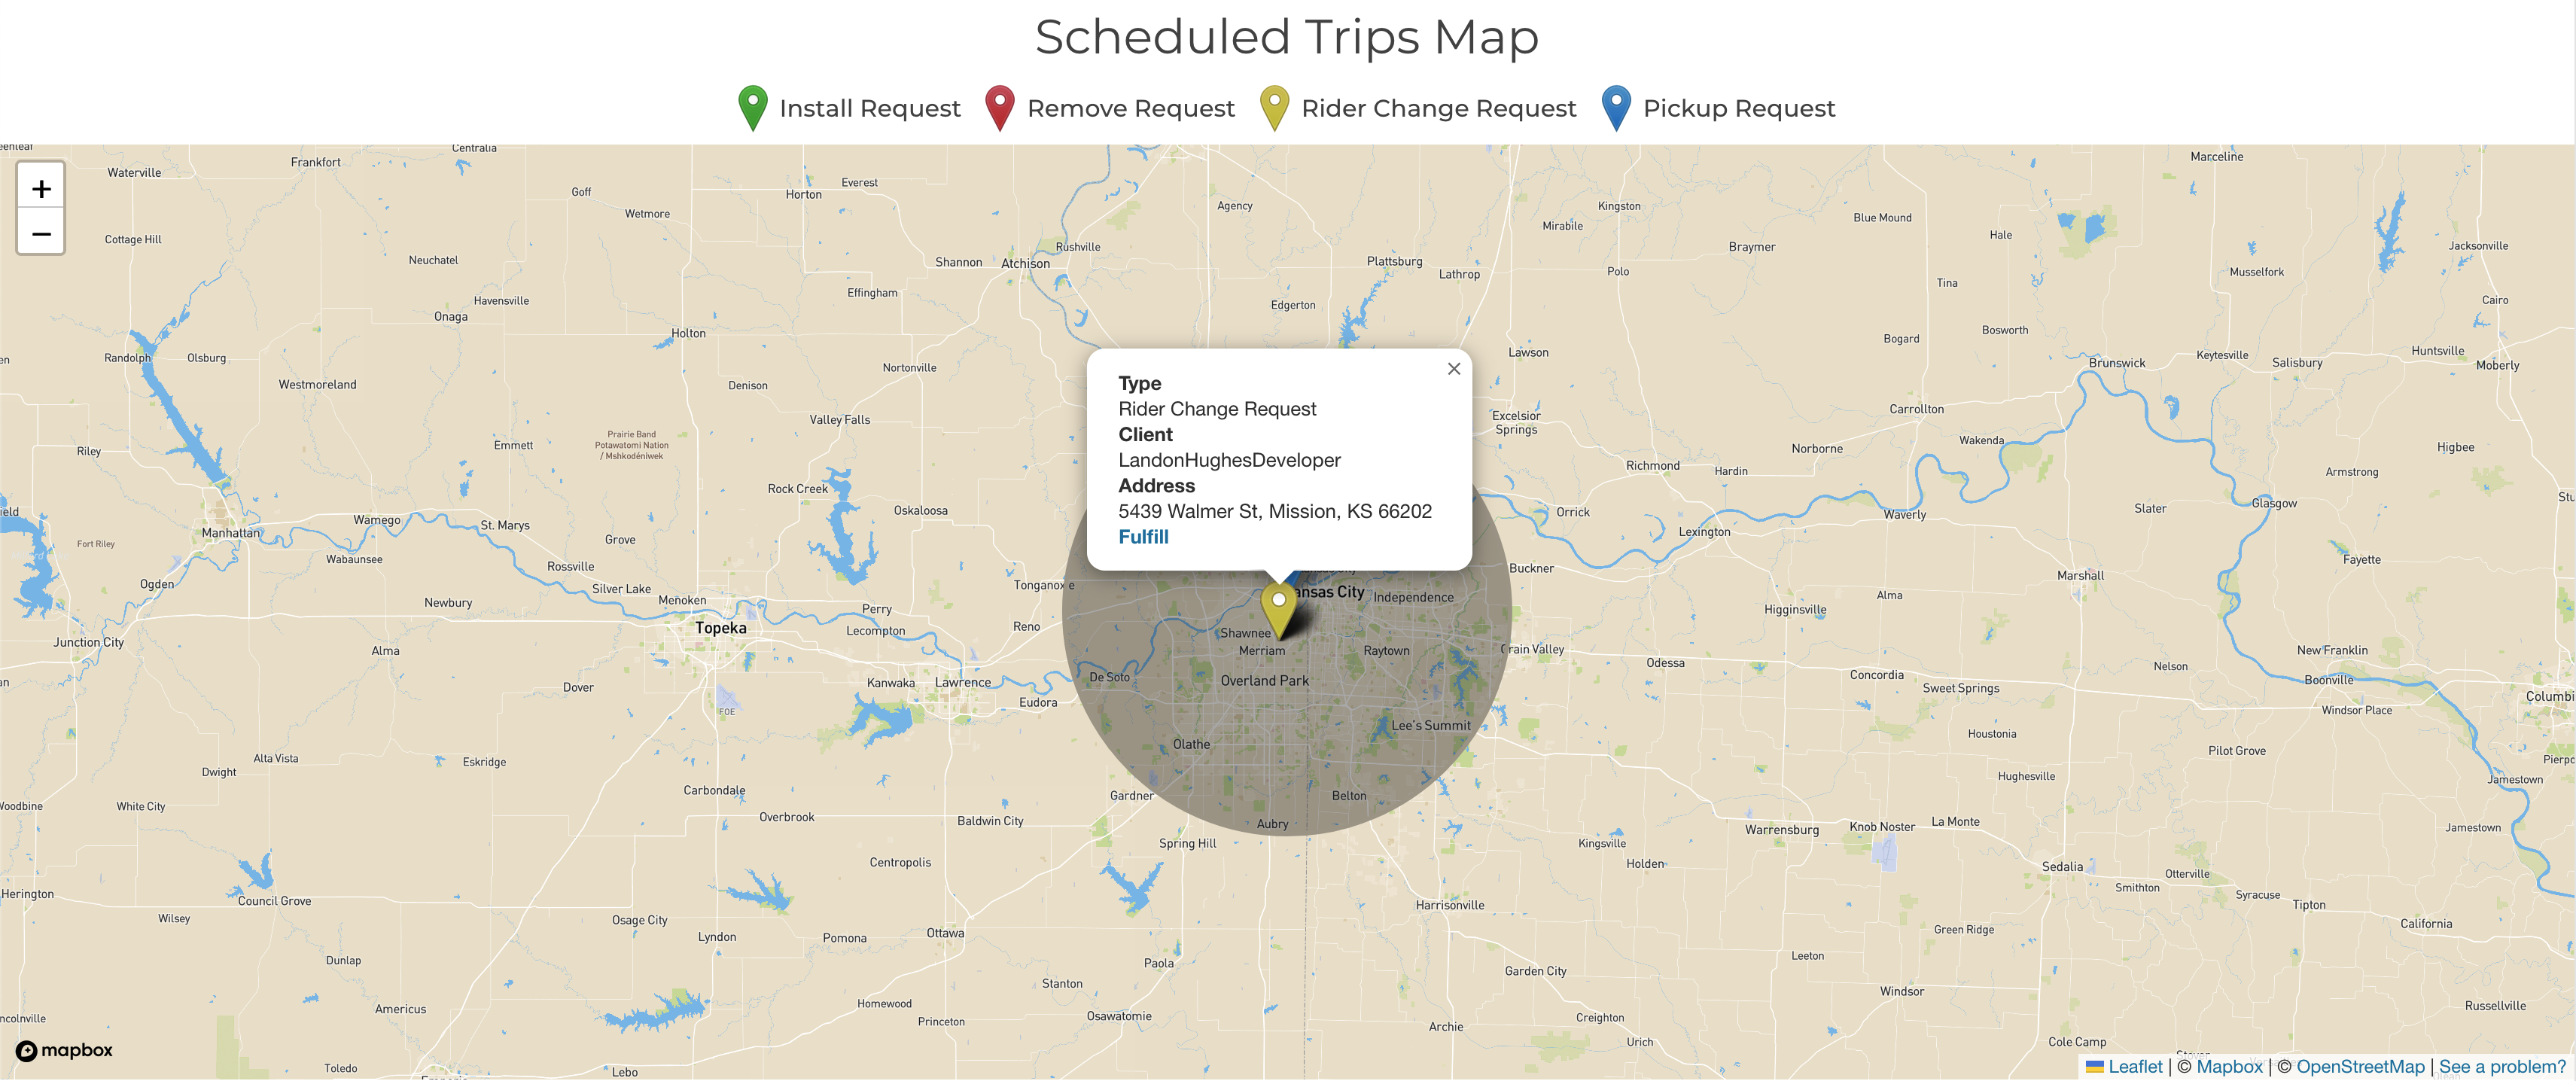
- By clicking or tapping on one of the pins, you will see the address, who the request is for in addition to the type of request. If you would like to fulfill one of the requests, click "Fulfill" and complete the request as usual.
Is there a way to see a list of signs that have been installed?
- Yes! From the admin action menu, click on the "Installed Signs List" link.
 .
. - This page is a list that shows all signs that have been installed.
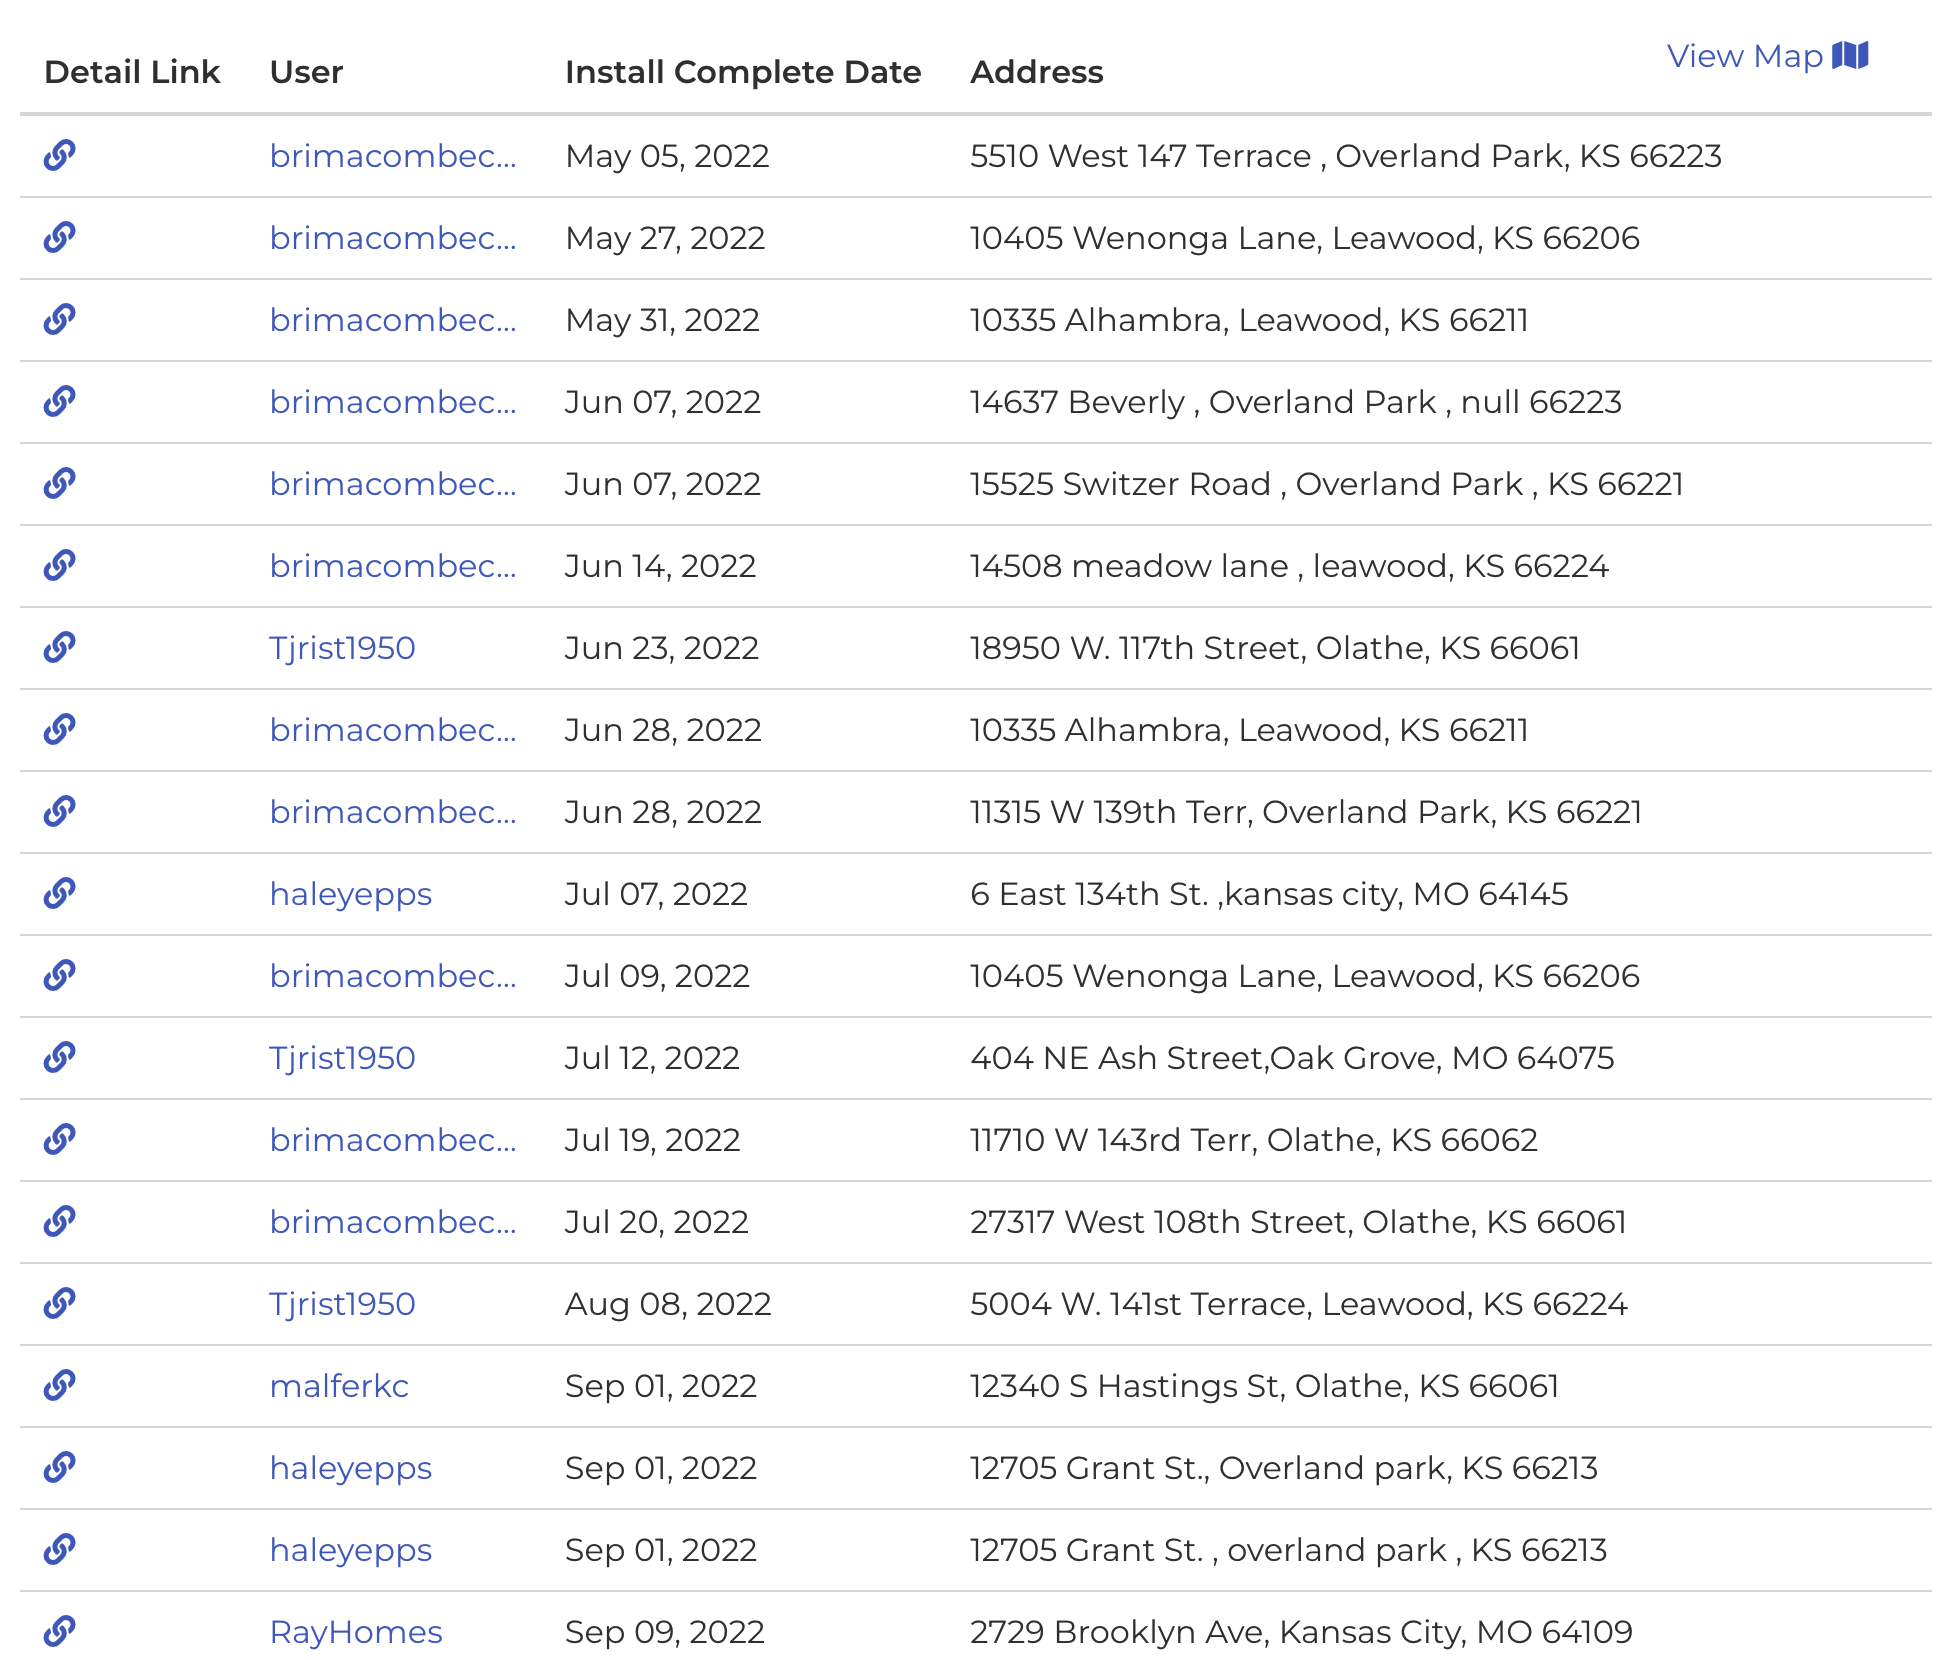 This list includes a link to the "install detail" page, the user that requested the installation, the install complete date, and the address.
No GPS coordinates were found for the address on a request. Can I redo the lookup myself?
- Yes! From the admin action menu, click on "Requests".

-
Find the request that needs the GPS lookup and click the link for it.
-
If the GPS coordinates weren't found, you can click "Retry GPS Lookup".
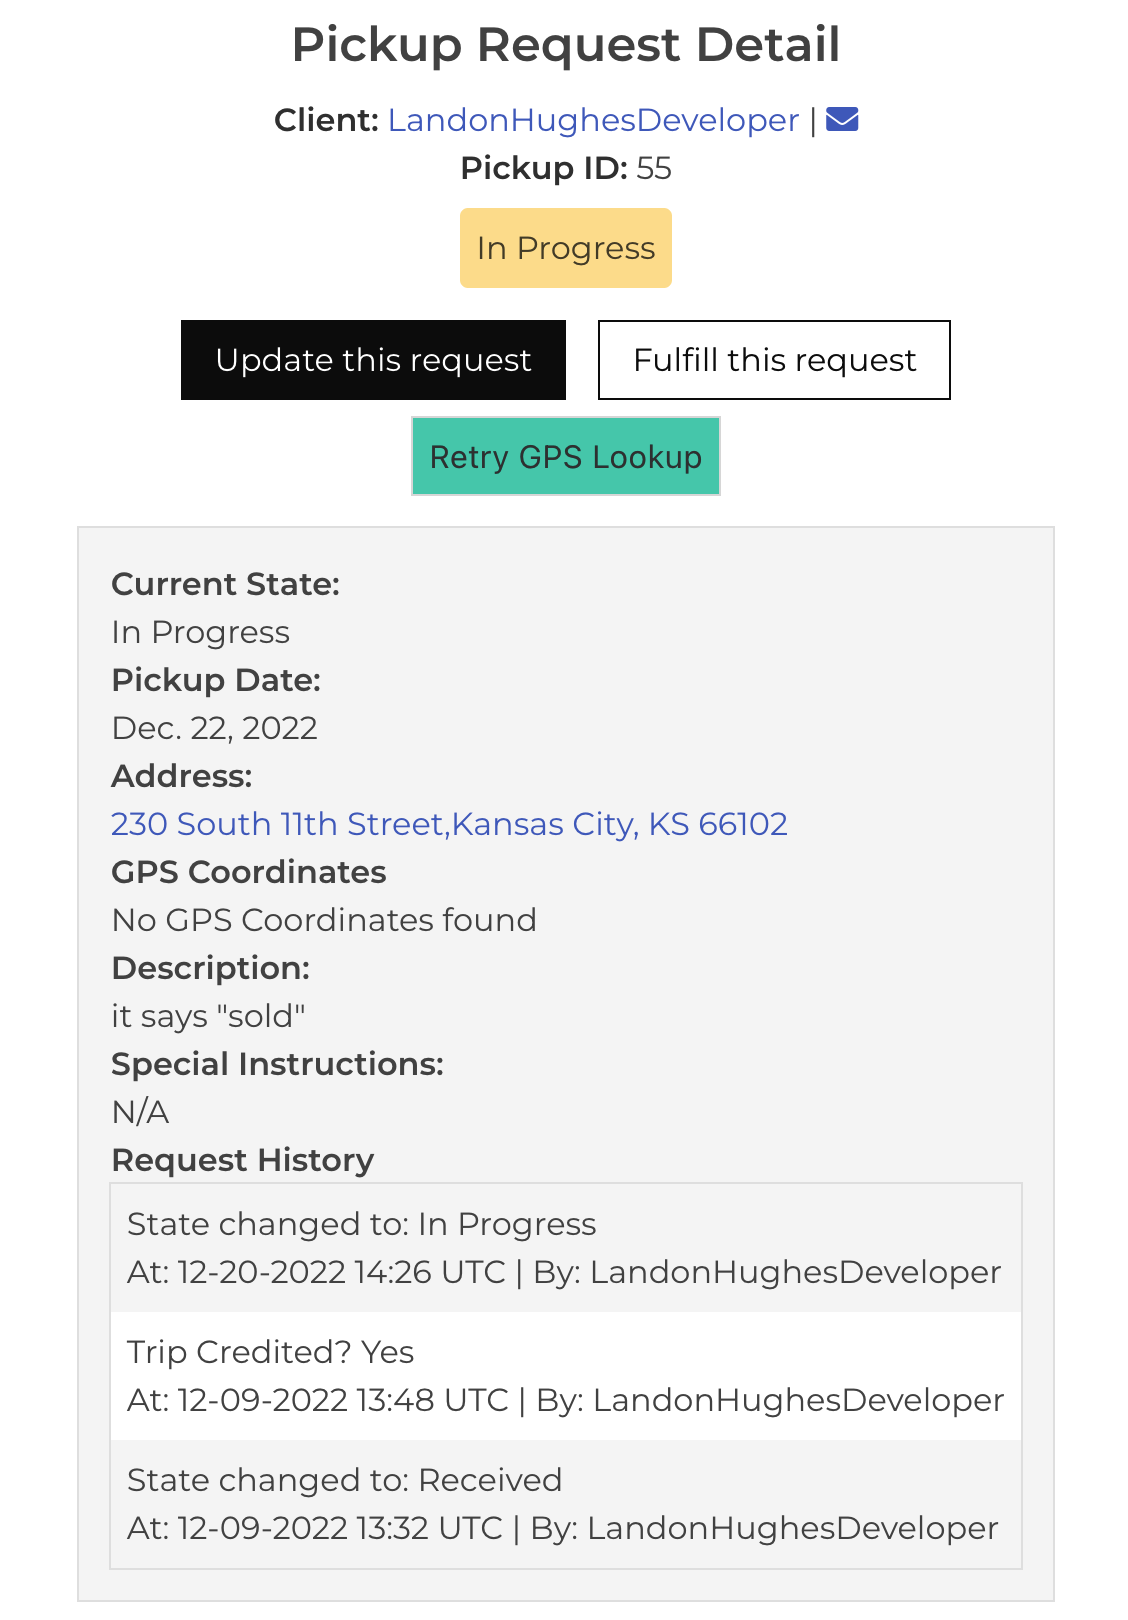
You can tell if the retry worked if the retry button disappears.
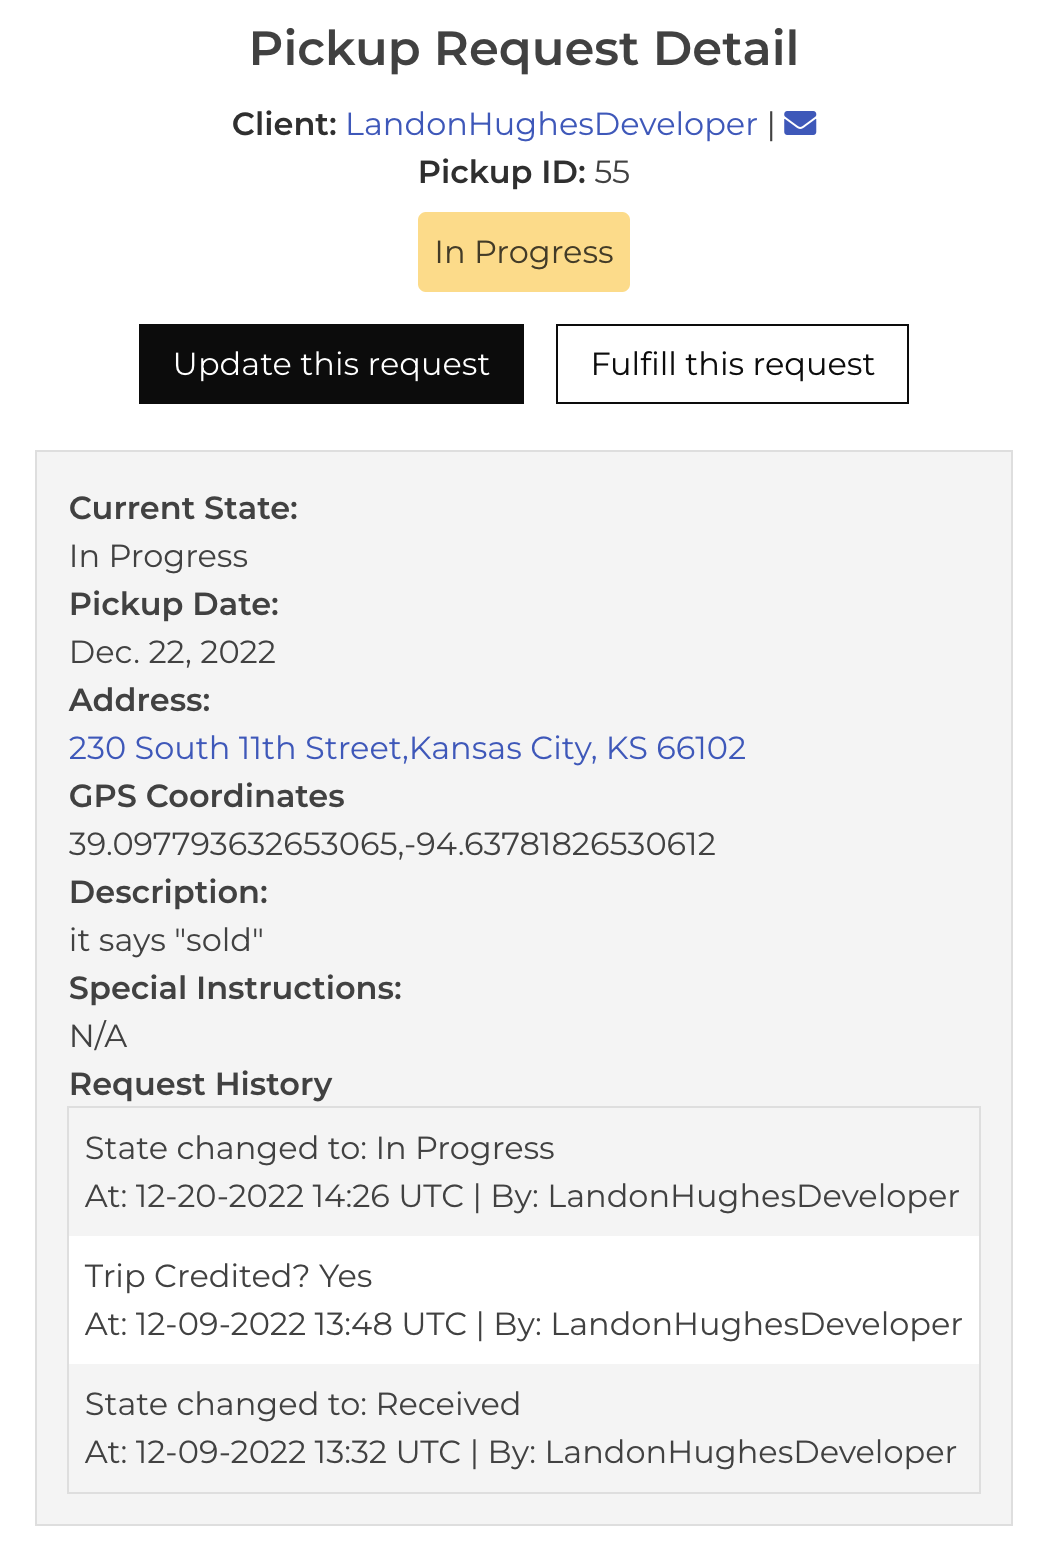 You can also tell if it worked if "GPS Coordinates" has a value.
Possible reasons the "GPS Retry" failed:
- The state is invalid
- The zip code is invalid
- There are spaces in the address where there shouldn't be spaces.
- The address was just recently established.
If the retry does fail, click the address link to see if google finds it. It's also easier to fix any spacing issues there.
Is there a page that contains all admin related pages?
- Yes! If you are an admin, there will be a header at the top of your screen indicating you are.
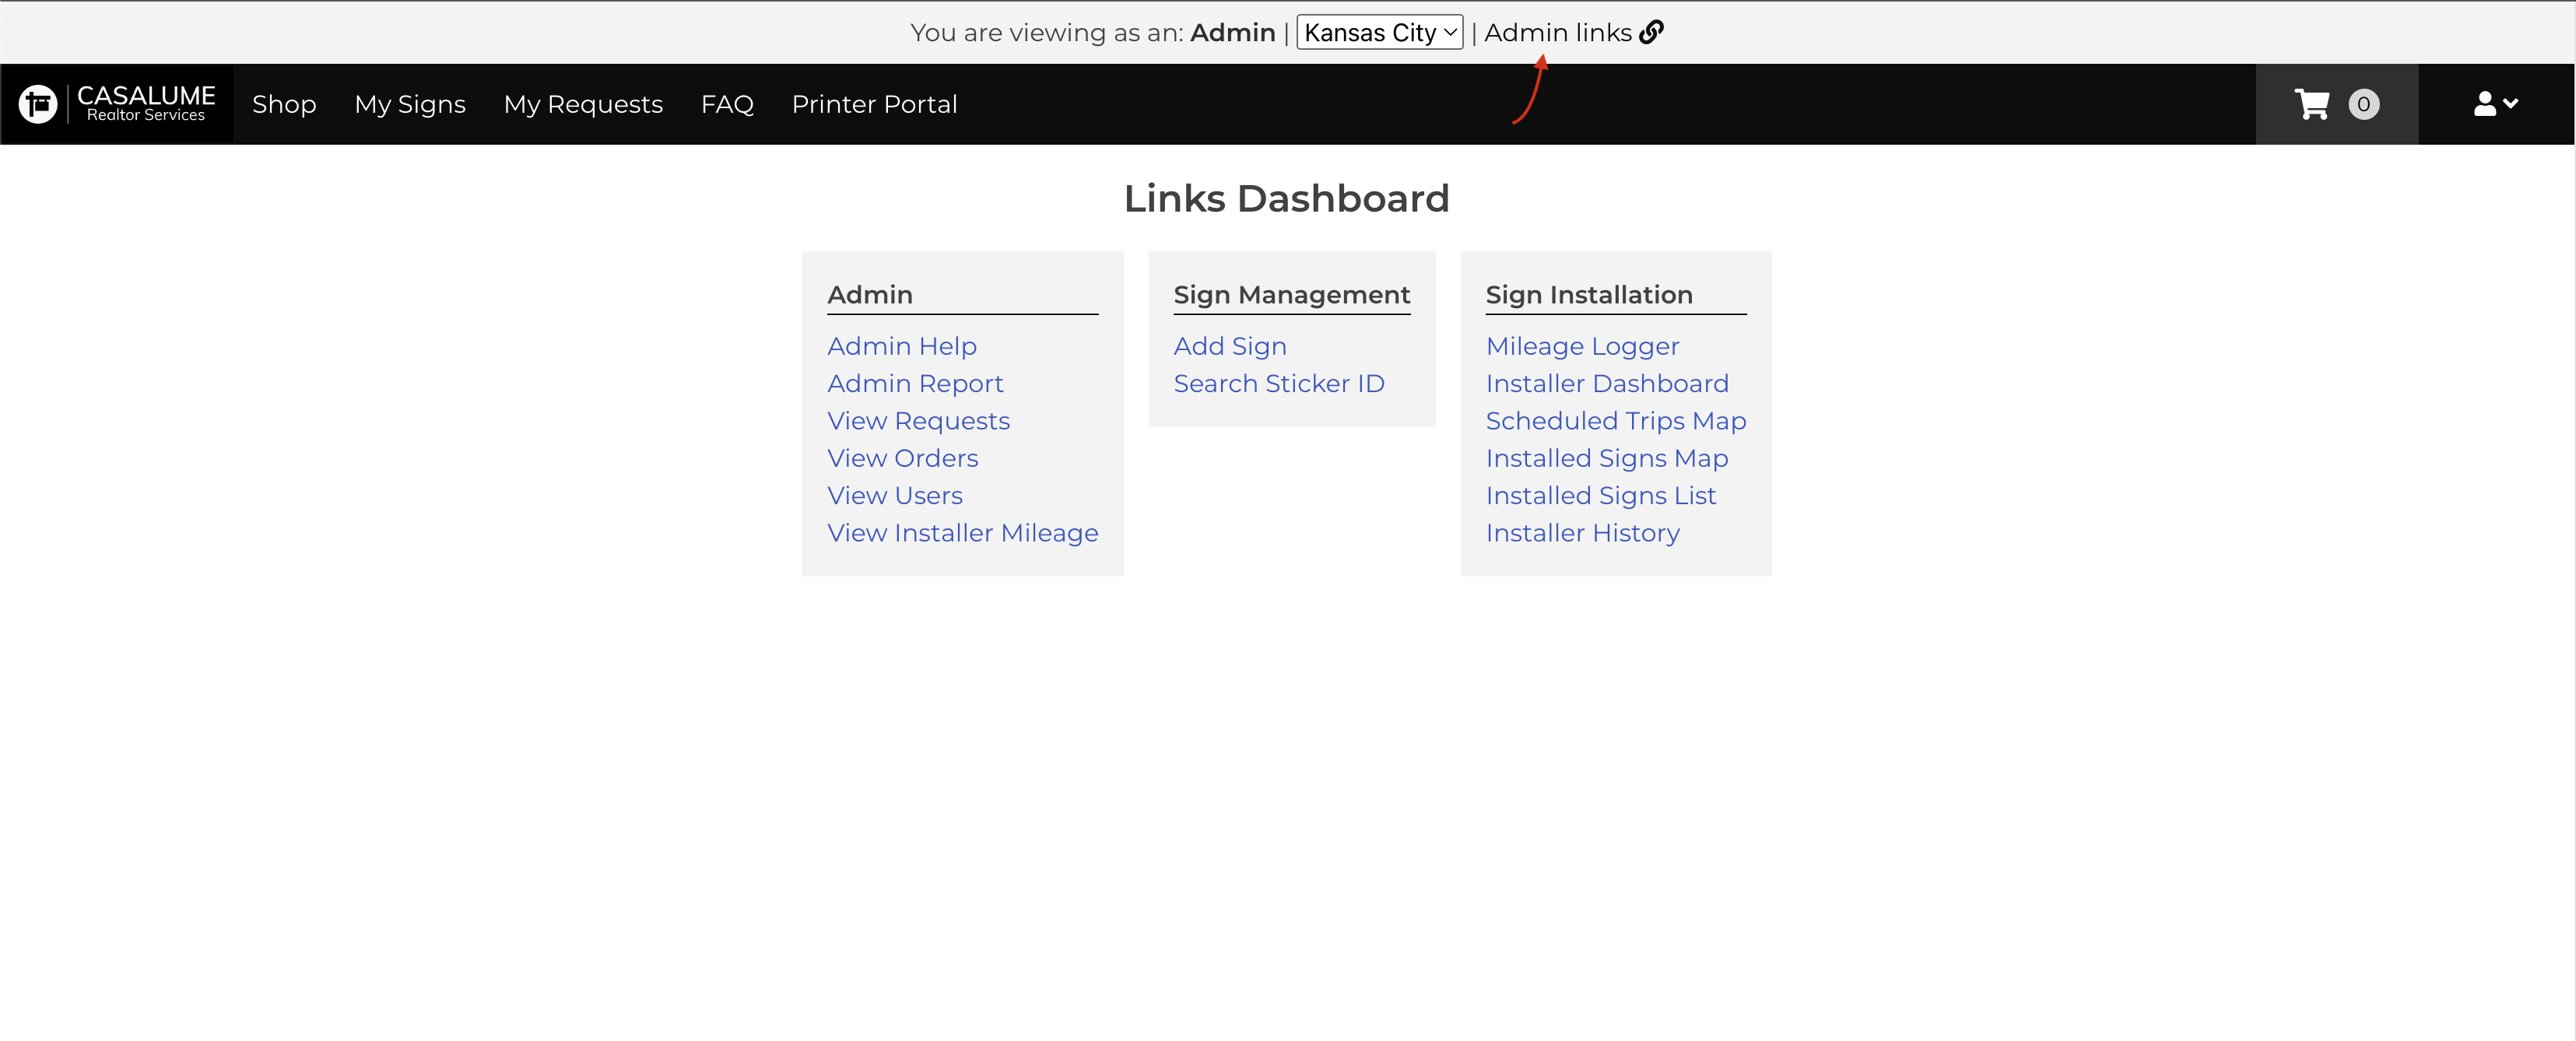
- Click on "Admin Links" at the top of your screen. You will be taken to a page that contains all the links admins have exclusive access to.